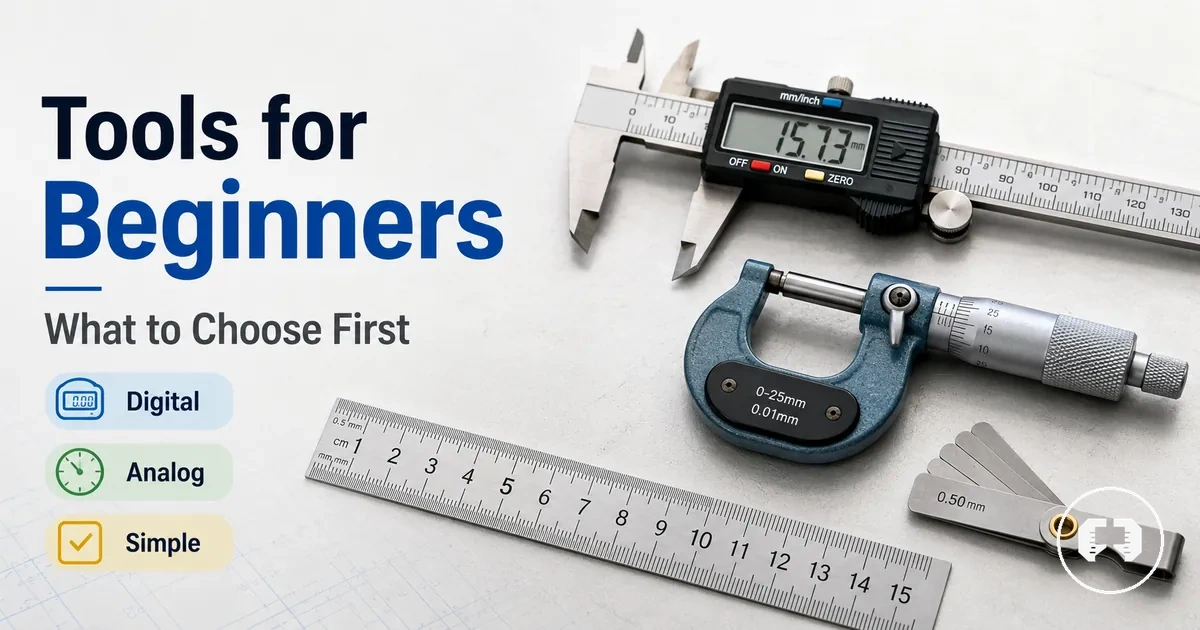
Beginner Precision Measuring Tools for First-Time Buyers
Beginner precision measuring tools should be chosen from the measurement need first, then checked against readability, accuracy expectation, and cost control. A practical first setup usually starts with a tool that matches the work a beginner actually measures, so first-tool selection is conditional.
For first-time buyers, a digital caliper may suit general outside, inside, and depth checks, while a basic micrometer may make sense when repeated thickness checks need more control. This page keeps the focus on beginner measuring tools and first-buy decisions, not a full professional metrology setup or a SKU comparison page. For the wider category context, use the precision measuring tools guide.
The common problem is buying a tool because it looks precise before knowing what must be measured. A readable display, stable scale, and realistic tolerance expectation can reduce user error more than an oversized starter kit. Start by matching measurement type, workpiece size, and tolerance as the first filter.
Beginner Precision Measuring Tools for First-Time Buyers can be organized with a short first-buy checklist before comparing tool categories. Use it to keep the first setup practical and avoid paying for accuracy or features that the task may not use yet.
- Define the main measurement need before choosing a first precision tool.
- Check whether the work needs outside, inside, depth, or thickness measurement.
- Match readability to the user, including display clarity, scale visibility, and likely reading mistakes.
- Set an accuracy expectation that fits the tolerance of the work, not the most advanced tool available.
- Control cost by choosing a single tool or simple measuring set that can be upgraded later.
Beginner Measurement Needs Before Choosing a Tool
Measurement problem comes before tool category because the work being measured determines what a suitable tool may be. If you are new to precision measuring, start by identifying the measurement target, part size, expected tolerance, and handling conditions before comparing tools. For a clear definition of what precision measuring tools mean, it helps to understand the purpose before choosing a category. Tool choice starts with the measurement problem.
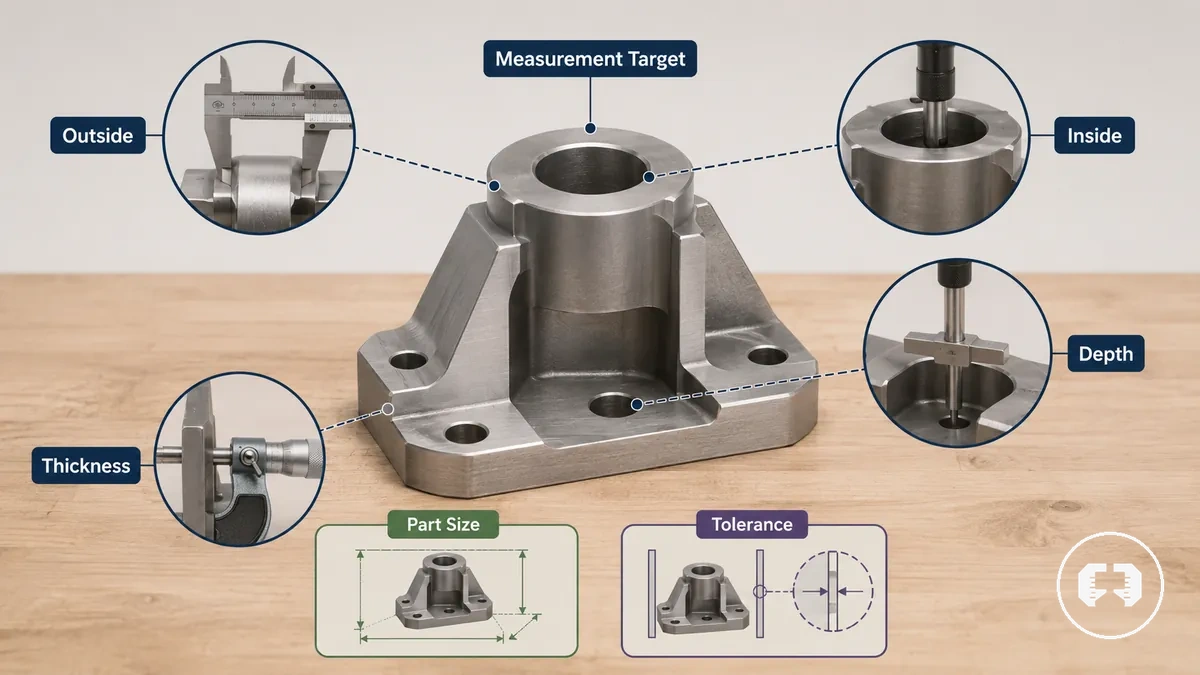
A workpiece that only needs an outside measurement may require a different tool category than a part that needs inside measurement, depth measurement, or a thickness check. Expected tolerance, part size, and material handling can influence which tool is practical. If measurements will be repeated often, stability and repeatability may become more important than choosing the highest available precision.
Choosing more precision than the measuring task requires can increase cost without providing a practical benefit for many beginners. Match the tolerance requirement to the work whenever possible, because buying extra precision may add complexity and expense without improving the result for the intended task.
Beginner Measurement Needs Before Choosing a Tool can be checked with the following list before selecting a tool category. It verifies the measuring task, part size, and tolerance requirement before comparing precision measuring tools.
- Identify the measurement target and the feature of the part that must be measured.
- Confirm the part size or workpiece dimensions the tool needs to reach.
- Decide whether the task requires outside measurement, inside measurement, depth measurement, or a thickness check.
- Estimate the expected tolerance based on the measurement need rather than assuming tighter tolerance is better.
- Consider material handling, including contact pressure and stability during measurement.
- Think about how often the measurement will be repeated before choosing a tool category.
Measurement Type, Workpiece Size, and Required Tolerance
Measurement Type, Workpiece Size, and Required Tolerance narrow the first tool choice because tool suitability changes with the measurement condition. A suitable tool depends on what is being measured, the size of the workpiece, and the required tolerance, so tool suitability depends on the measurement condition.
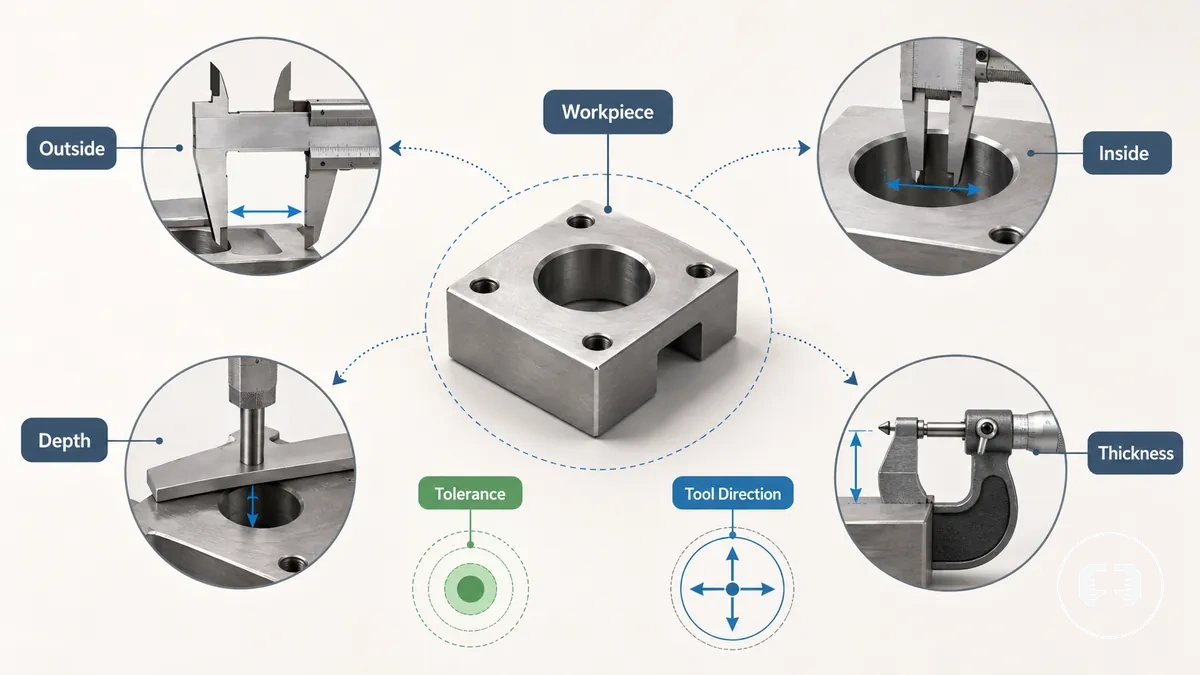
When different measurement conditions apply, the most suitable tool direction may also change. The table below organizes Measurement Type, Workpiece Size, and Required Tolerance into common beginner situations by matching each workpiece, measurement attribute, and value or condition with a practical first-tool direction.
| Entity or part | Measurement attribute | Value or condition | First-tool direction |
|---|---|---|---|
| Small part | Outside measurement | General size range with a typical accuracy need | A general-purpose caliper may be a suitable tool direction. |
| Flat workpiece | Thickness check | Thickness is the primary measurement condition | A tool intended for thickness measurement may be more suitable. |
| Hole or opening | Inside measurement | Internal dimensions require reliable contact | Choose a tool designed for inside features when this condition applies. |
| Recess or slot | Depth measurement | Depth is the main measurement attribute | Use a tool with a depth measurement function when depth is the priority. |
| Repeated workpiece | Accuracy need | Consistent readings are more important than maximum precision | Select a tool direction that supports stable, repeatable measurements. |
Precision Tools That Are Too Advanced for a First Setup
Advanced tools may be useful later, but they are not always necessary for a first setup. If a tool adds cost, skill demand, or complexity without matching the current measurement task, delaying the purchase is often a practical choice. Advanced does not mean necessary first.
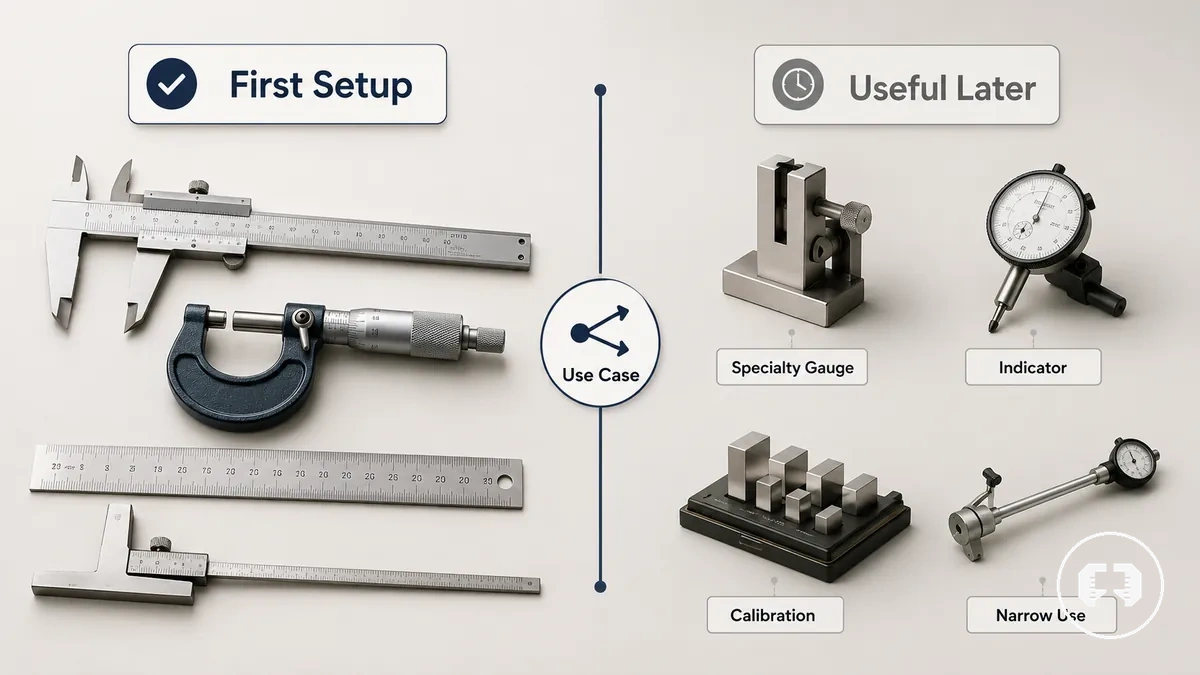
Choosing advanced tools too early can increase cost and make measurement more difficult than the current use case requires. Filtering specialty gauges, indicators, calibration references, and narrow-use instruments by measurement needs, skill demand, and accuracy requirement helps identify which tools may be useful later instead of necessary for a first setup.
Advanced measuring instruments are not low in value. Their usefulness depends on the work type and accuracy requirement, so many become appropriate as measurement tasks become more specialized.
Precision Tools That Are Too Advanced for a First Setup can be filtered by the current use case with this caution checklist.
- Delay specialty gauges when general measuring tasks do not yet require their narrow purpose.
- Choose indicators later if their effective use depends on skills that are still being developed.
- Add calibration references when the accuracy requirement makes routine verification relevant.
- Postpone narrow-use instruments until a specific measurement condition requires them regularly.
- Reconsider any advanced tool when added cost and complexity exceed the needs of the current use case.
First Precision Measuring Tools Worth Buying
First precision measuring tools should match broad beginner measurement tasks before moving to specialty categories. Digital calipers, basic micrometers, rules, squares, gauges, and indicators each serve a different measurement role, so the first purchase should be based on the work being measured rather than a product ranking.
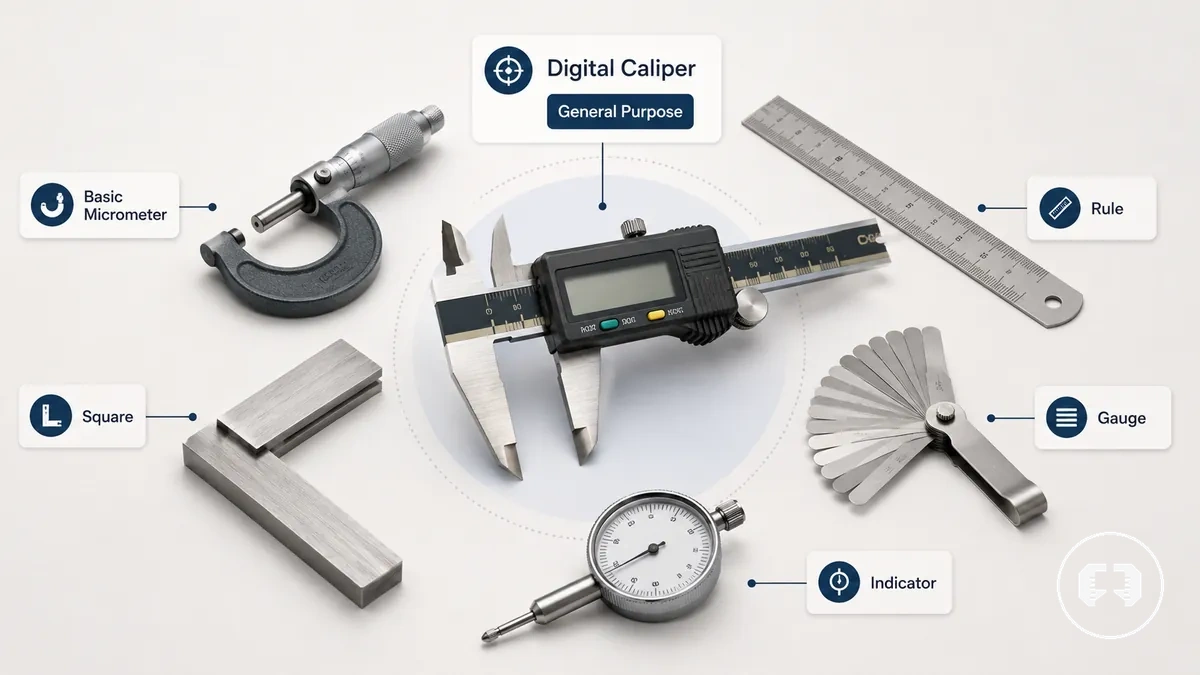
If general outside, inside, and depth measurements are the priority, digital calipers may be the most suitable first category because they cover multiple measurement tasks. If repeated thickness measurements become more important, basic micrometers may be a better first choice for that specific need. Rules, squares, gauges, and indicators support setup, alignment, reference, or comparison tasks. For a broader overview of common precision measuring tool types, compare category roles before selecting a first purchase.
Choosing specialty categories too early can increase learning burden without improving the decision outcome for many beginners. General-purpose coverage usually comes before specialty accuracy because it builds practical measuring experience before adding more task-specific tools.
First Precision Measuring Tools Worth Buying can be grouped by beginner use case so each category is matched to its measurement role instead of a universal purchase order.
- Digital calipers: May suit beginners who need outside, inside, and depth measurements with one general-purpose tool category.
- Basic micrometers: May become the preferred category when repeated thickness or diameter measurements require more consistent contact.
- Rules and squares: Support layout, straightness, alignment, and reference checks before precision measurements.
- Gauges and indicators: Can become useful supporting tools when comparison, setup checking, or repeatability is part of the measurement task.
Digital Calipers as the First General-Purpose Tool
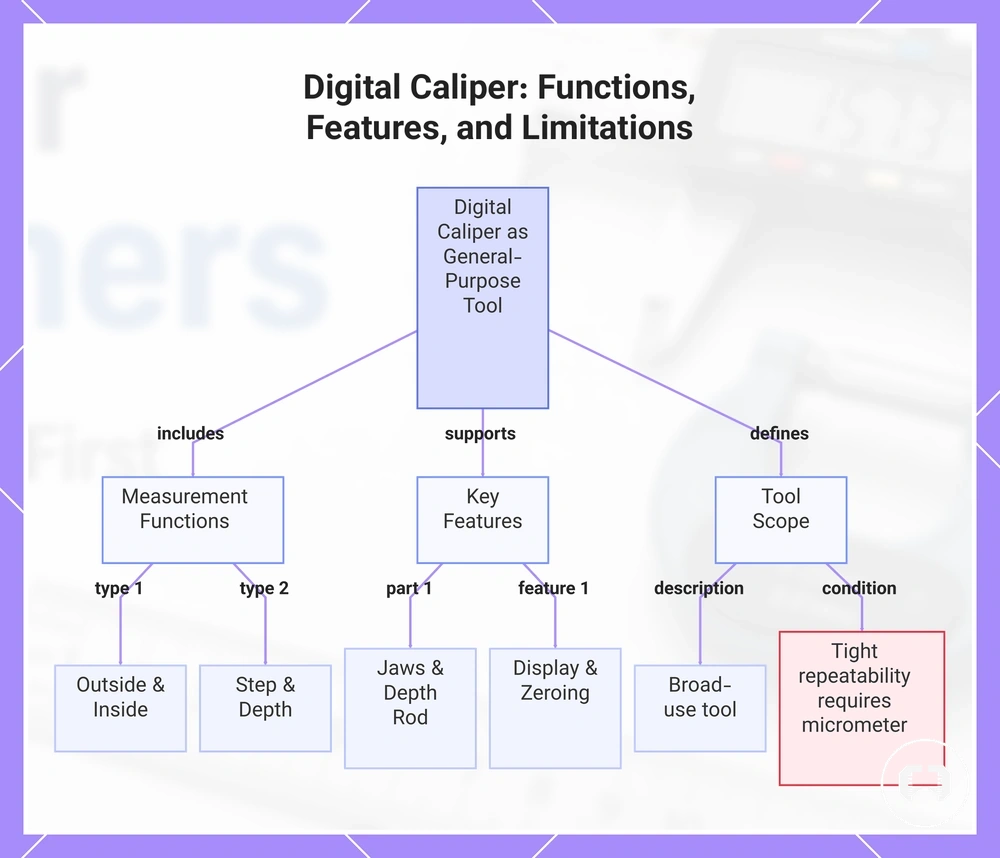
A digital caliper is often the first general-purpose tool for beginners because it can perform outside measurement, inside measurement, step measurement, and depth measurement with one instrument. The combination of multiple measuring functions, a readable display, and simple zeroing makes it suitable for many everyday tasks. A digital caliper is a broad-use tool rather than an all-use tool.
When measuring the outside diameter of a shaft, the inside width of an opening, or the depth of a recess, a digital caliper may be enough for the job. If a task requires more consistent thickness measurements with tighter repeatability, another measuring tool, such as a micrometer, may be more appropriate. Whether a digital caliper is enough depends on the measurement requirement.
The following features help a digital caliper support outside, inside, step, and depth measurements.
- Jaws: Perform outside measurement and inside measurement using dedicated measuring surfaces.
- Depth rod: Supports depth measurement when measuring holes, slots, or recesses.
- Display and zeroing: Improve readability and allow the caliper to be reset before measurement, helping reduce reading errors.
- Range and resolution: Influence whether the caliper is suitable for the size and detail of the measurement task.
- Handling stability: Steady handling can improve repeatability and increase beginner confidence during measurement.
This chart shows the measurement functions, key features, and scope of a digital caliper, including when a micrometer may be needed.
Basic Micrometers for Tighter Thickness Measurements
A basic micrometer becomes useful when tighter thickness measurement or diameter measurement is needed after caliper limits become clear. Its spindle, anvil, and ratchet or friction thimble help provide more consistent contact during repeated measurements. A basic micrometer is usually worth considering when repeatable thickness checks become a regular part of the measuring task.
When the same sheet, pin, or round part is measured repeatedly for thickness or diameter, a basic micrometer may provide better repeatability for that specific job. A caliper often remains suitable for broader measurement tasks, while a micrometer may become the better choice when caliper limits affect confidence in tighter measurements. Whether a micrometer is needed depends on the measurement requirement and purchase timing.
The following comparison can help clarify when a basic micrometer becomes the better choice.
- Purpose: A caliper covers a wider range of measuring tasks, while a basic micrometer focuses on tighter thickness measurement and diameter measurement.
- Spindle, anvil, and ratchet or friction thimble: These components help maintain more consistent contact pressure, supporting repeatability.
- Range and resolution: Check that the measuring range and level of detail match the intended task before purchasing.
- Purchase timing: A basic micrometer is usually justified after caliper limits become clear through repeated thickness checks rather than as an automatic first purchase.
Rules, Squares, Gauges, and Indicators as Supporting Tools
Supporting tools can improve setup, reference checking, and repeatability without turning the first purchase into a large kit. They support a primary measuring tool rather than replace it, making them useful additions only when the measurement condition requires them.
When accurate setup or reference checking affects measurement confidence, a supporting tool may become worthwhile. The following list separates tools that are often useful early from those that are typically optional, helping keep the first purchase focused on the intended measuring task instead of expanding into unnecessary accessories.
- Rule: Useful early for basic setup and reference checking when simple linear measurements or layout confirmation are needed.
- Square: Useful early for checking alignment and supporting setup before taking precision measurements.
- Simple gauge: May be useful when a specific measurement condition benefits from quick comparison or reference checking, but it is often optional in a first purchase.
- Indicator: May support repeatability during alignment or comparison tasks when measurement consistency becomes more important, although it is usually optional for beginners.
Beginner-Friendly Features That Reduce Reading Mistakes
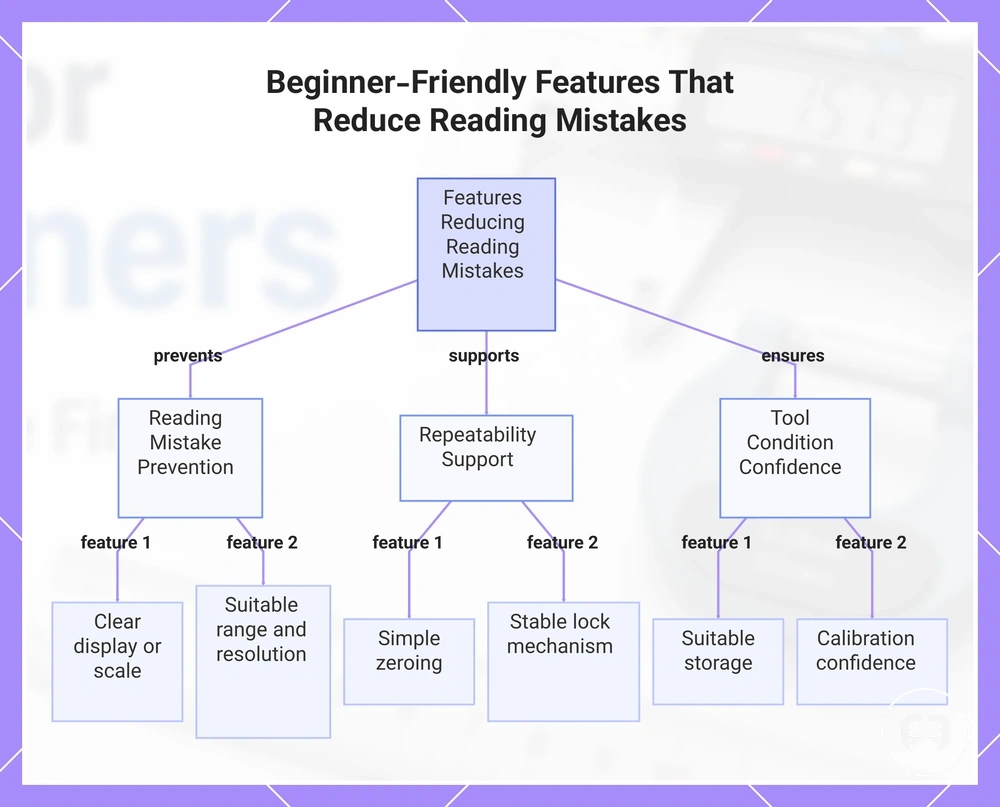
Beginner-friendly features can reduce reading mistakes by making measurements easier to read, easier to repeat, and easier to verify. Readability, stable handling, and clear controls help reduce common beginner errors during measurement. Choosing usability features that match the measurement task is more important than choosing the longest feature list.
Misreading a display or scale, losing stable contact, or changing tool position between readings can reduce repeatability. Features such as readability, suitable range, appropriate resolution, simple zeroing, and reliable lock stability can help reduce these risks when they fit the measurement condition. Build quality, suitable storage, and calibration confidence can also support consistent use over time. Feature count is not the same as measurement quality.
When choosing between a simple readable tool and a feature-heavy alternative, the easier-to-read option may be the safer choice if it supports consistent measurements. Extra features can improve measurement confidence when they match the intended use, but they should not replace clear usability or stable handling.
Beginner-Friendly Features That Reduce Reading Mistakes can be reviewed with the following checklist, which organizes usability features by the type of error they may help reduce.
- Readability: A clear display or scale can reduce reading mistakes and improve measurement confidence.
- Range and resolution: Choose a suitable range and resolution for the measurement condition instead of assuming higher values are always better.
- Zeroing: Simple zeroing helps establish a consistent starting point before taking a measurement.
- Lock stability: A stable locking mechanism may help preserve a reading while it is checked or recorded, supporting repeatability.
- Build quality: Consistent handling can support repeatability, although build quality alone does not determine measurement quality.
- Storage: Suitable storage can help protect the tool between uses and support long-term condition.
- Calibration confidence: Confidence that the tool is in suitable measuring condition can support more reliable measurement practices when verification is appropriate.
This chart groups usability features by the type of error they help reduce, showing how readability, measurement setup, and tool condition support consistent measurements.
Clear Displays, Scale Readability, and Unit Switching
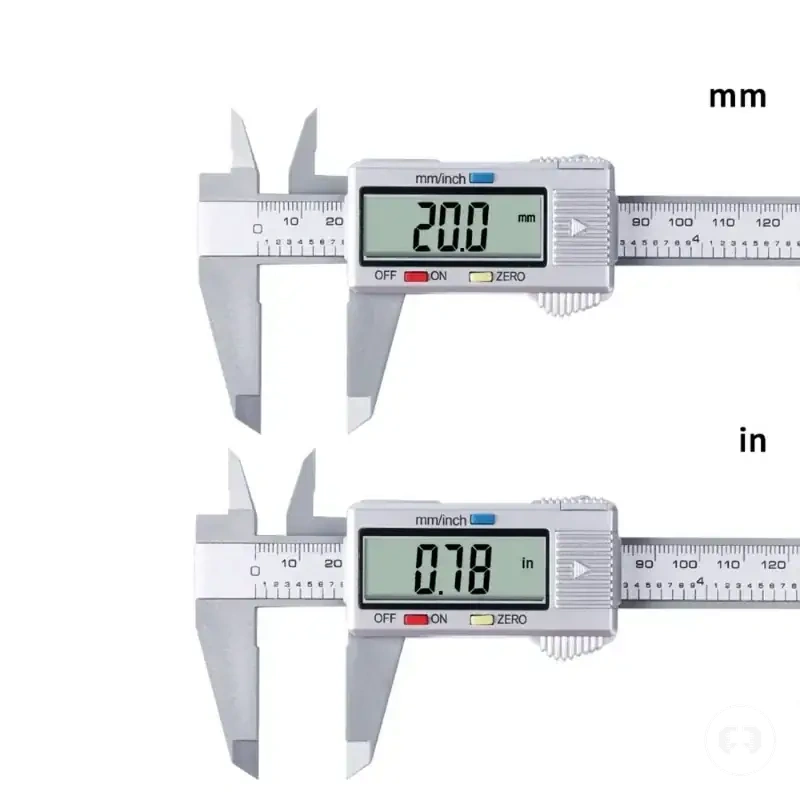
Display clarity, scale readability, and unit switching can reduce reading confusion by making measurement values easier to identify and verify. A clear digital display with suitable contrast or a readable analog scale can improve reading confidence, but readable output is different from correct measuring technique and does not by itself determine measurement accuracy.
Misreading risk can increase when display contrast is poor, an analog scale is difficult to see, or metric and imperial units are confused after unit switching. Choosing a digital display with clear characters, checking the active unit before recording a reading, and using an analog scale with good visibility can help reduce these risks. Whether these features improve measurement outcomes still depends on consistent measuring technique as well as clear reading.
The following checks can help verify display-related features before choosing a tool.
- Digital display: Look for suitable display size and contrast to improve reading clarity.
- Analog scale: Choose a readable scale with good visibility to reduce reading errors.
- Unit switching: Confirm whether the tool is displaying metric or imperial units before recording a measurement.
- Misreading risk: Verify the displayed unit and reading after every unit change to help avoid recording the wrong value.
Range, Resolution, Zeroing, and Locking Stability
Range, resolution, zeroing, and locking stability affect how easily beginners can make repeatable measurements under different measuring conditions. Choosing a suitable measuring range, appropriate displayed increments, reliable zero reset, and stable locking can help reduce error risk during repeated measurements. These features support repeatability, but measurement outcomes still depend on tool quality and user technique.
Finer resolution is not automatically a better choice because extra displayed increments cannot compensate for inconsistent handling or unstable measurements. For example, a tool with consistent zeroing may produce more repeatable measurements than one with finer displayed increments if the zero reset remains stable between readings. The table below connects Range, Resolution, Zeroing, and Locking Stability to common measurement conditions and their effect on beginner measurements.
| Feature | Condition | Effect on beginner measurement | Selection cue |
|---|---|---|---|
| Range | Workpiece size must fit the measuring range. | Helps reduce selection errors and supports repeatable measurements. | Choose a measuring range that matches the intended workpiece. |
| Resolution | Displayed increments should suit the measurement task. | May reduce reading uncertainty when paired with good technique. | Do not assume finer resolution alone improves results. |
| Zeroing | Zero reset is checked before each measurement. | Can improve repeatability and reduce error risk between readings. | Look for a simple and consistent zero function. |
| Locking stability | The reading must remain steady while being viewed or recorded. | May reduce movement that can affect repeatability. | Choose lock stability that helps maintain the reading during use. |
Digital, Dial, and Vernier Choices for Beginners
Digital, dial, and vernier choices for beginners differ mainly in display type, which affects readability, maintenance, and learning burden. Each format uses a different readout method and presents different trade-offs for battery dependence, scale interpretation, durability, speed, and beginner error risk. The most suitable display type depends on reading comfort and the intended use conditions.
When quick numerical readings are the priority, one format may be easier to use, while other situations may favour mechanical simplicity or reduced battery dependence. The comparison below shows how Digital, Dial, and Vernier Choices for Beginners differ in readability, maintenance, learning burden, and common use conditions.
| Format | Reading method | Main beginner benefit | Main trade-off | Best use condition |
|---|---|---|---|---|
| Digital | Electronic readout | Quick numerical readout with simple interpretation | Battery dependence | May suit beginners who prefer fast readings with less scale interpretation. |
| Dial | Dial scale and pointer | No battery dependence | Requires dial scale interpretation | May suit users who are comfortable reading an analog format. |
| Vernier | Vernier scale | Simple mechanical design without battery dependence | Higher learning burden and greater beginner error risk during scale interpretation | May suit users willing to spend more time learning the reading method. |
If reading mistakes continue, choosing a display type that better matches your reading style may help reduce beginner error risk, although durability, speed, and ease of use still depend on the tool and the measuring task. For a broader comparison beyond this beginner-focused overview, see digital or analog measuring tools.
Starter Kit Logic for a First Precision Measuring Set
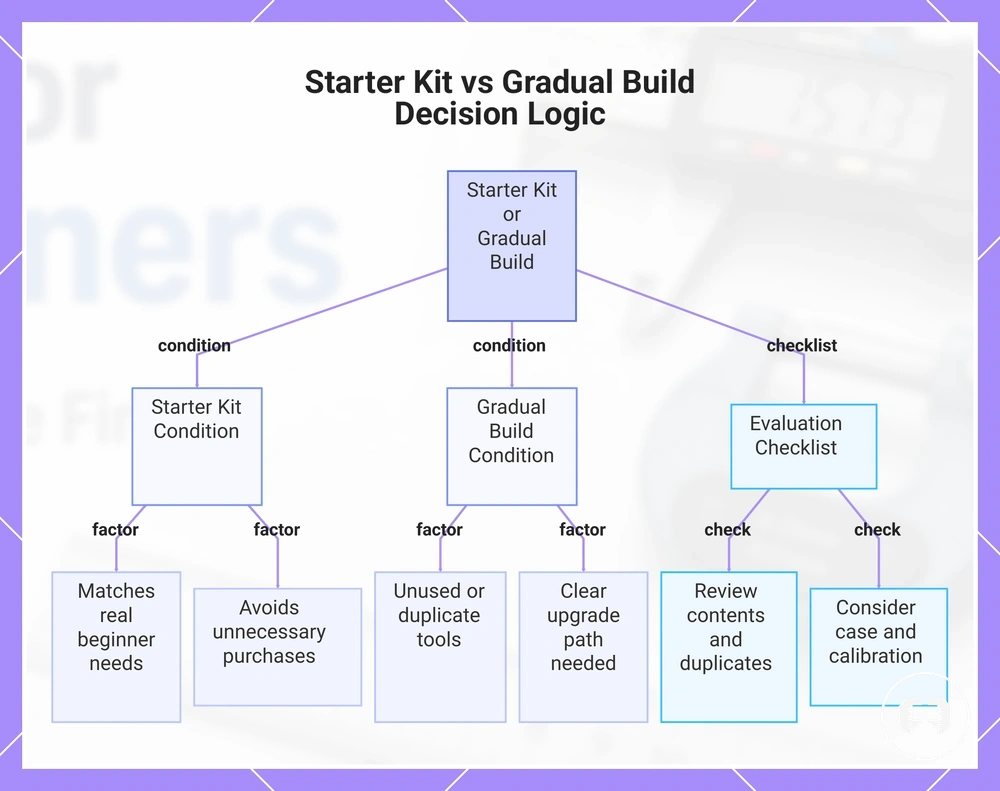
A starter kit or first precision measuring set is worthwhile only when its task coverage matches real beginner measurement needs and helps avoid unnecessary purchases. Building gradually may be the better choice if many kit contents would remain unused or duplicate tools you already have. Kit value depends on whether each included item supports the measurements you actually plan to perform.
For hobby use, a smaller first measuring set may provide enough task coverage without adding unnecessary tools. During workshop learning, a beginner kit with practical kit contents and a storage case may help keep measuring tools organized while supporting a wider range of practice tasks. For tighter tolerance work, building gradually may provide a clearer upgrade path as measurement requirements become more specific.
Unused or duplicate tools can reduce the value of a starter kit because they increase cost without improving task coverage. Reviewing kit contents, checking for duplicate tools, and considering storage case quality and calibration confidence can help reduce avoided waste. A gradual setup may be the better decision when each additional tool addresses a genuine beginner measurement need.
A starter kit is useful only when its contents match the intended work rather than simply increasing the number of tools. After deciding whether a kit or gradual setup better suits your needs, continue with choosing precision measuring tools for broader selection guidance.
Starter Kit Logic for a First Precision Measuring Set can be evaluated with the following checklist, which focuses on task coverage and avoided waste.
- Does each item in the starter kit solve a real beginner measurement need?
- Do the kit contents improve task coverage without adding duplicate tools?
- Will the storage case help protect and organize the first precision measuring set?
- Does the kit provide suitable calibration confidence for the intended measuring tasks?
- Is there a practical upgrade path as future measurement needs change?
- Would building gradually reduce avoided waste while still covering the required tasks?
This chart shows the conditions for choosing a starter kit or building a measuring set gradually, along with essential evaluation checks.
What to Buy First Versus What to Add Later
What to buy first versus what to add later depends on the measurement type, tolerance condition, and common task. The first tool should solve the task measured most often before later tools fill specialty gaps.
If most work involves general measuring, the first tool may need broad coverage. If repeated measurements or tighter tolerance conditions become more common, a second tool may be justified for that narrower need. Supporting accessories and specialty tools should be added later only when they solve a specific setup, repeatability, or measurement problem.
What to Buy First Versus What to Add Later can be organized by measurement need with this staged checklist.
- Buy first: Choose the first tool that covers the most common task and measurement type.
- Add second: Add a second tool when repeated measurements or a tighter tolerance condition makes the first tool less suitable.
- Add supporting accessories: Add supporting accessories when setup, reference checking, or repeatability becomes part of the use case.
- Add specialty tools later: Add specialty tools only when a specific task creates a clear measurement gap.
- Keep the order flexible: Let the purchase order follow the measurement need rather than a fixed sequence for everyone.
When a Single Tool Is Better Than a Full Kit
A single reliable tool may provide better cost-value than a full kit when the measurement task is narrow, the budget is limited, or many included tools would remain unused. A full kit may still be the better choice when its included tools match current measurement needs, so the better first purchase depends on the intended work.
A common assumption is that a full kit always offers better value because it includes more tools. In practice, one good caliper may be a better first purchase than a broad but weak kit when broad use and reliability matter more than tool quantity, while kit quality variation, storage needs, and the risk of unused tools can influence the overall decision.
When a Single Tool Is Better Than a Full Kit can be checked with these cost and waste signals.
- Choose a single reliable tool: It may provide better cost-value when one measurement type covers most tasks.
- Consider a full kit: It may be worthwhile when the included tools closely match current measurement needs.
- Review storage needs: A storage case may become more useful when multiple tools need protection and organization.
- Check for unused tools: A broad kit may provide less value if many included tools are unlikely to be used.
Accuracy and Cost Tradeoffs for Beginner Tools
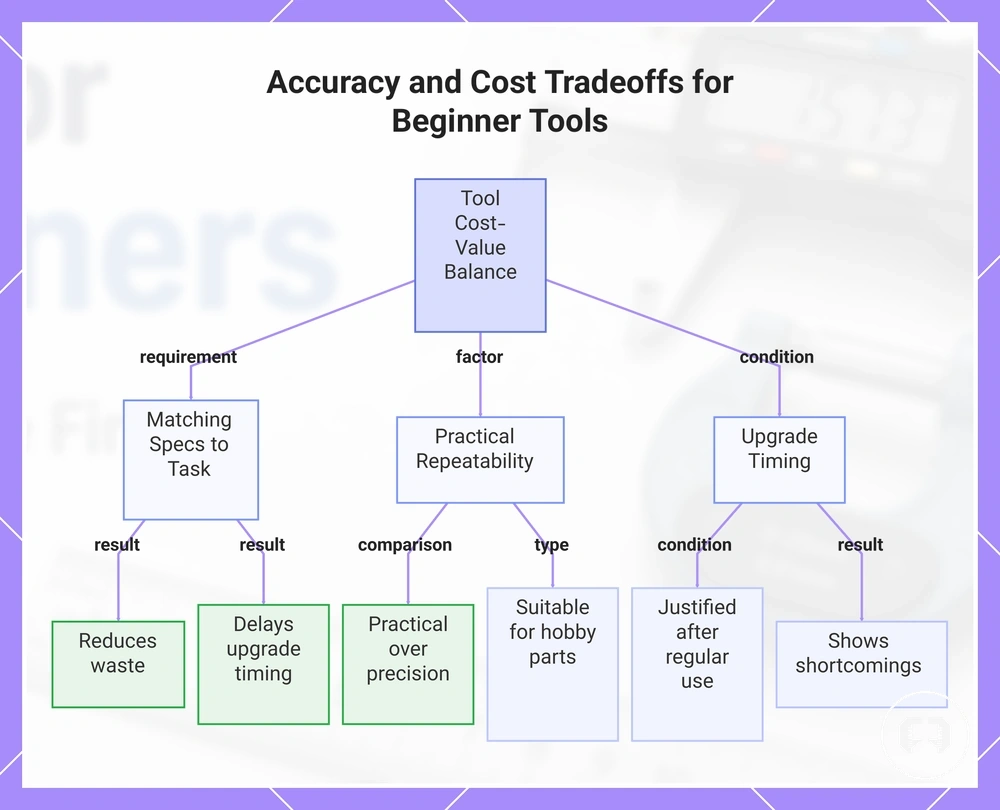
Accuracy needs and tool cost should be balanced according to the measurement task rather than the highest available specification. Beginner tools with suitable resolution and useful repeatability can provide better cost-value than tools that exceed the actual accuracy need. Cost-value depends on the accuracy need of the intended work.
Higher resolution does not automatically improve repeatability. A tool with a suitable quality condition for the measurement task may support confidence better than extra displayed precision that is rarely needed. Matching resolution, repeatability, and quality condition can reduce waste and delay upgrade timing until measurement needs become clearer.
If a beginner measures common hobby or workshop parts, paying for useful repeatability may be more practical than paying for unnecessary precision. If the measurement tolerance becomes more demanding, a higher-quality tool category may become worthwhile when it supports the required outcome. Upgrade timing is usually easier to justify after regular use shows where the current tool falls short.
Higher tool cost does not automatically solve beginner measurement needs because value depends on the relationship between accuracy needs, resolution, repeatability, and quality condition. A beginner budget is often used more effectively when the selected tool supports current work without creating unnecessary waste or premature upgrades.
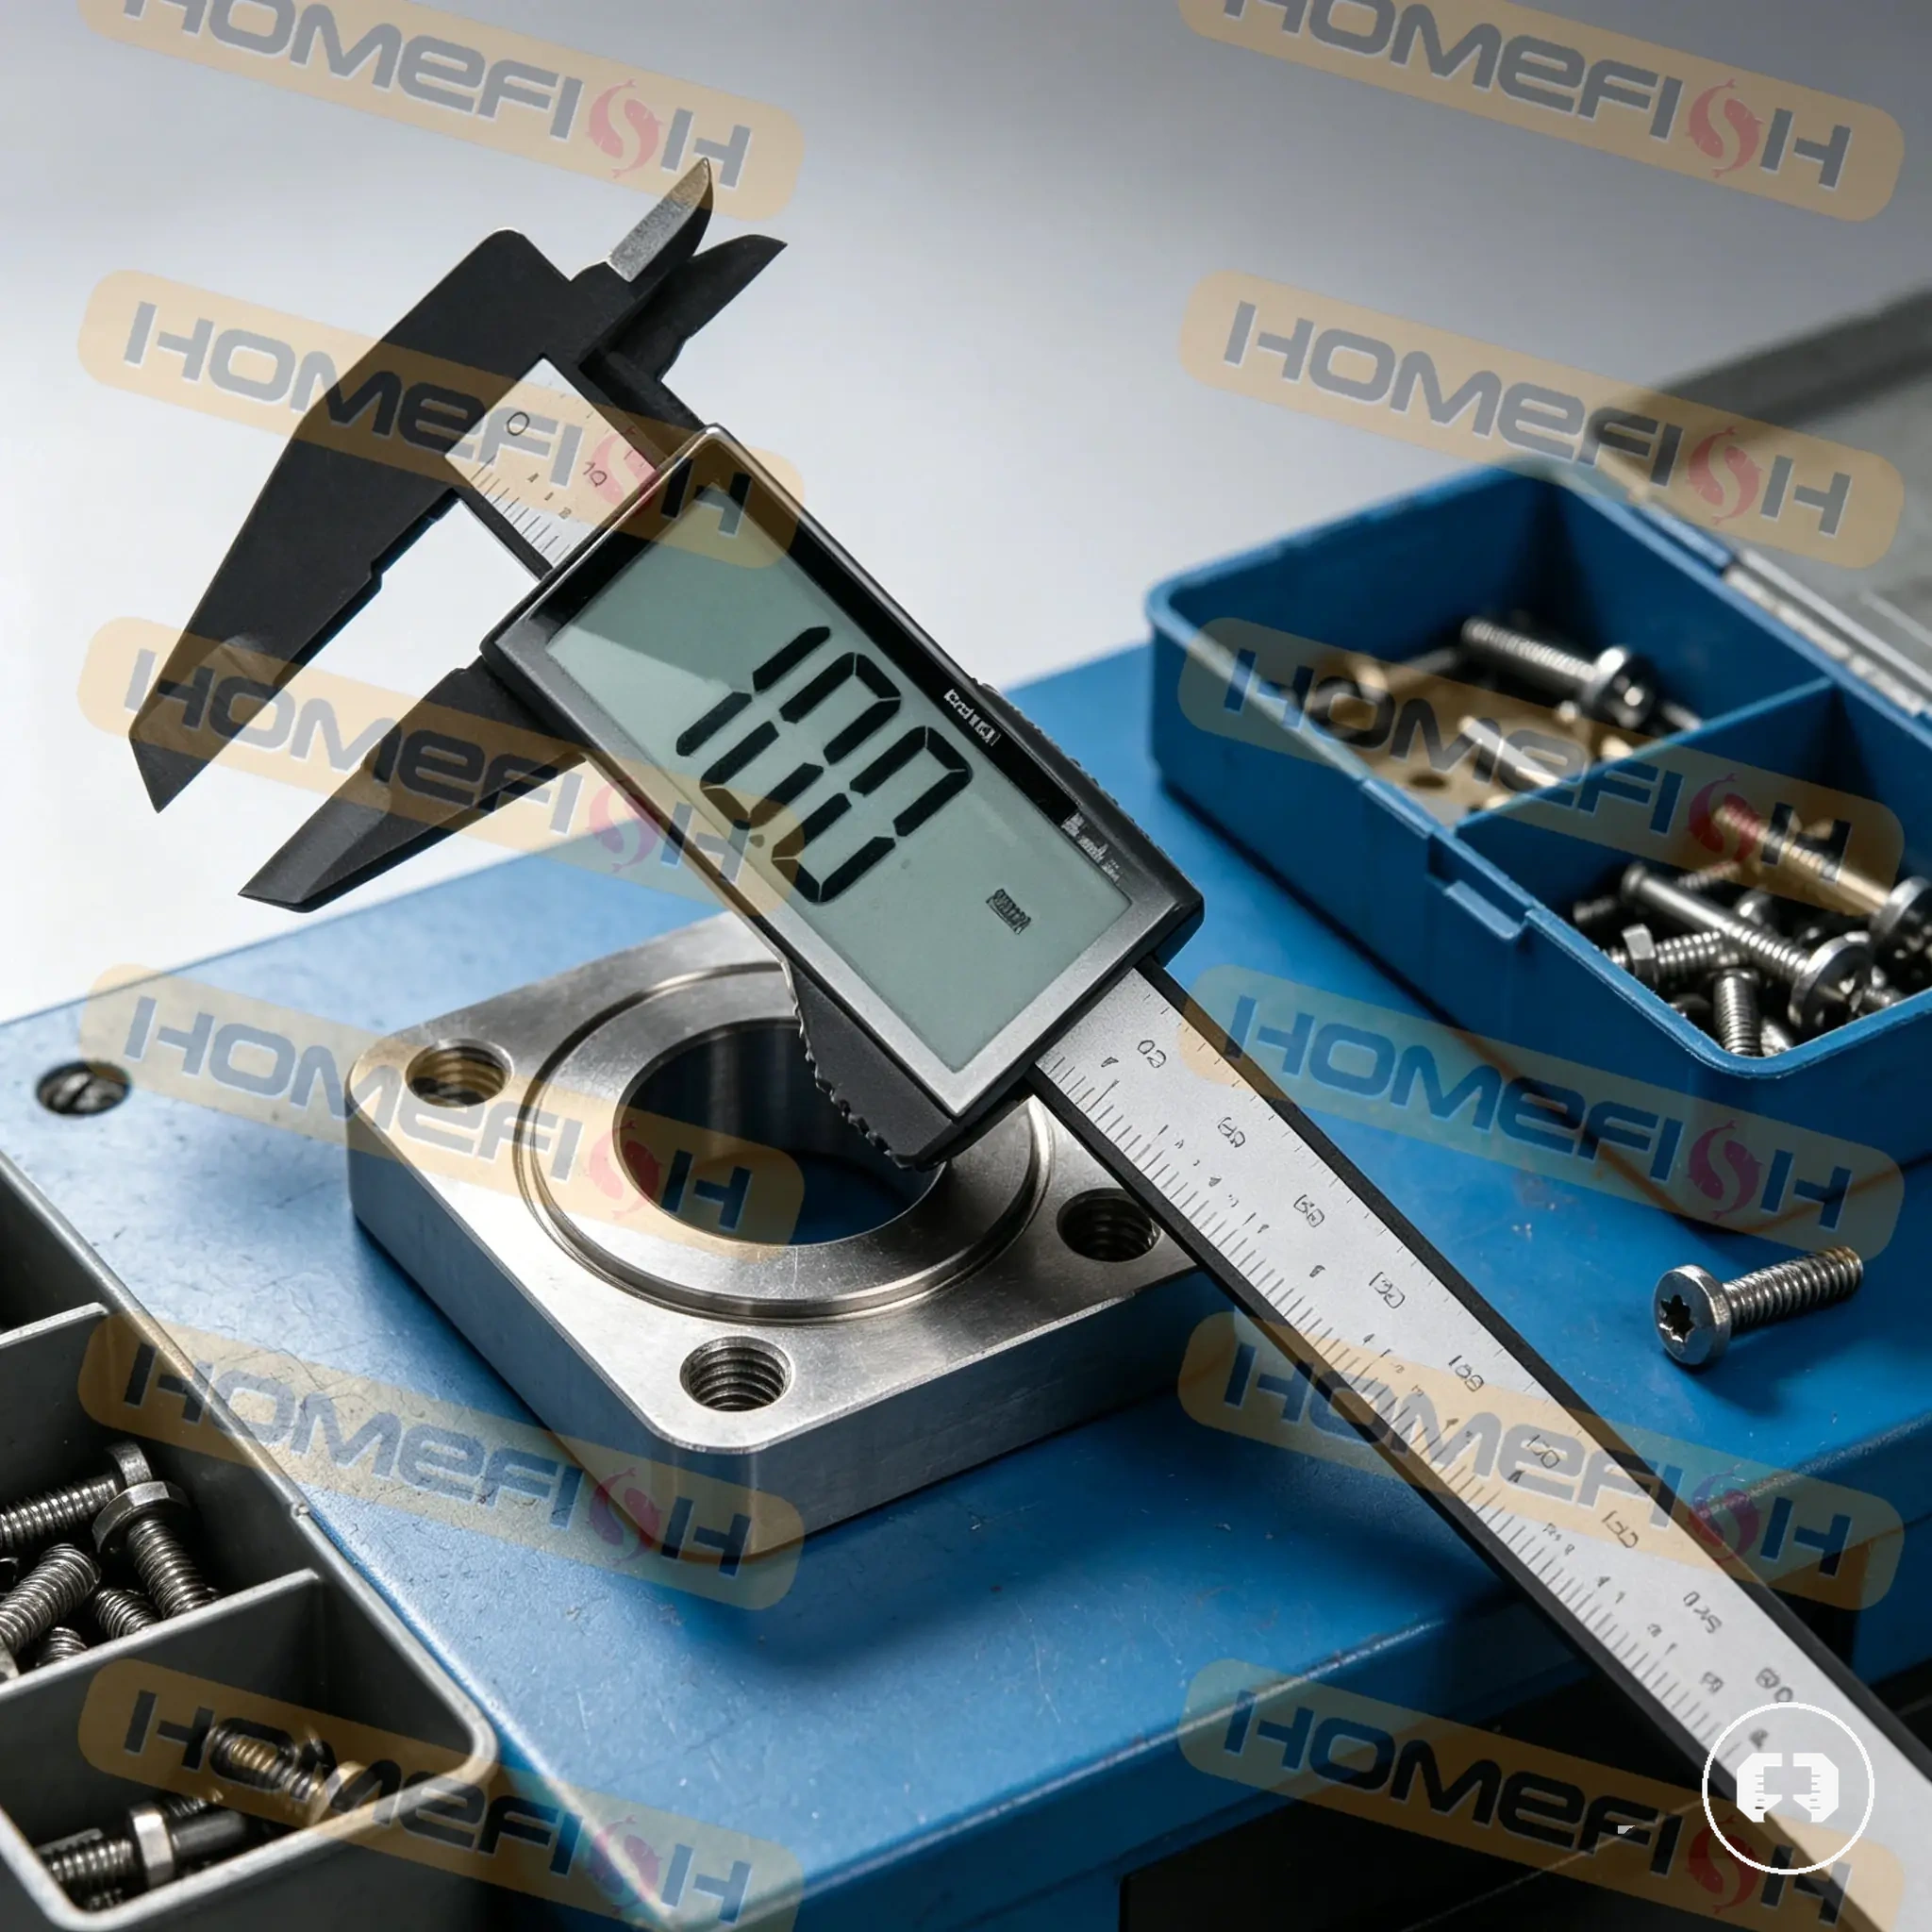
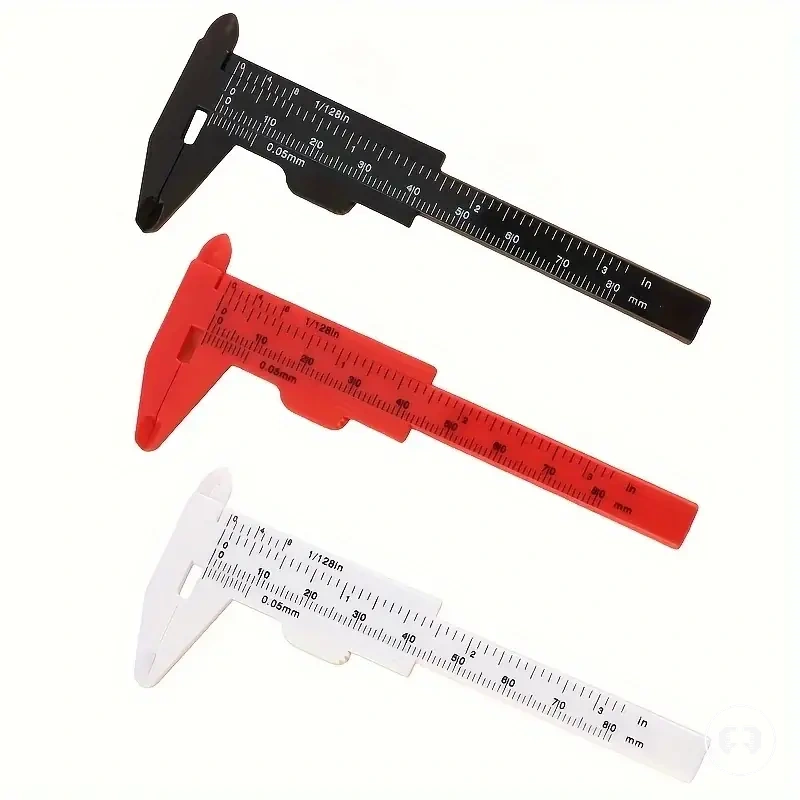
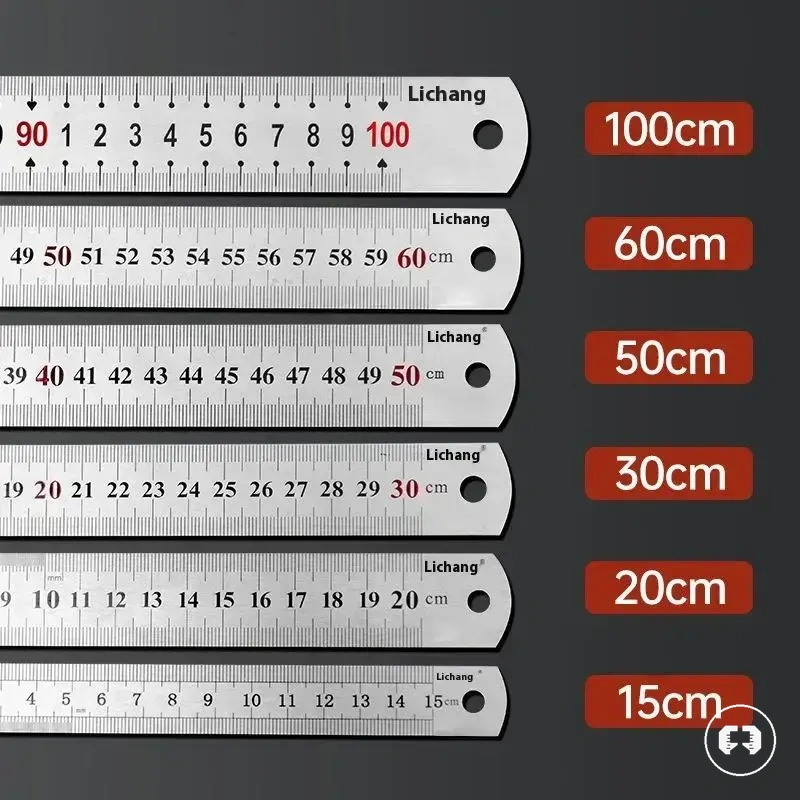
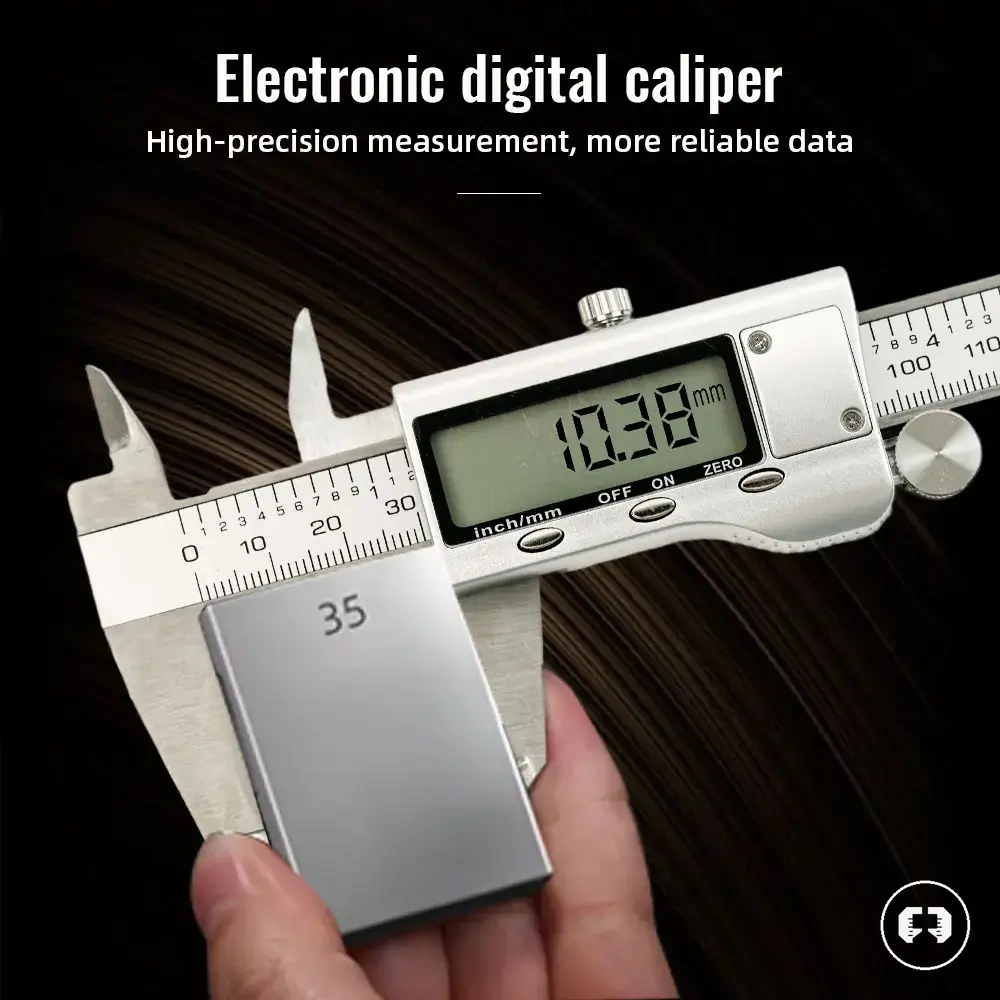
The products below are useful examples for comparing available options. Before buying, check that the compatibility criteria, key features, and product details match your needs.
This chart shows the key factors for balancing tool accuracy and cost, focusing on matching specs to task, practical repeatability, and upgrade timing.
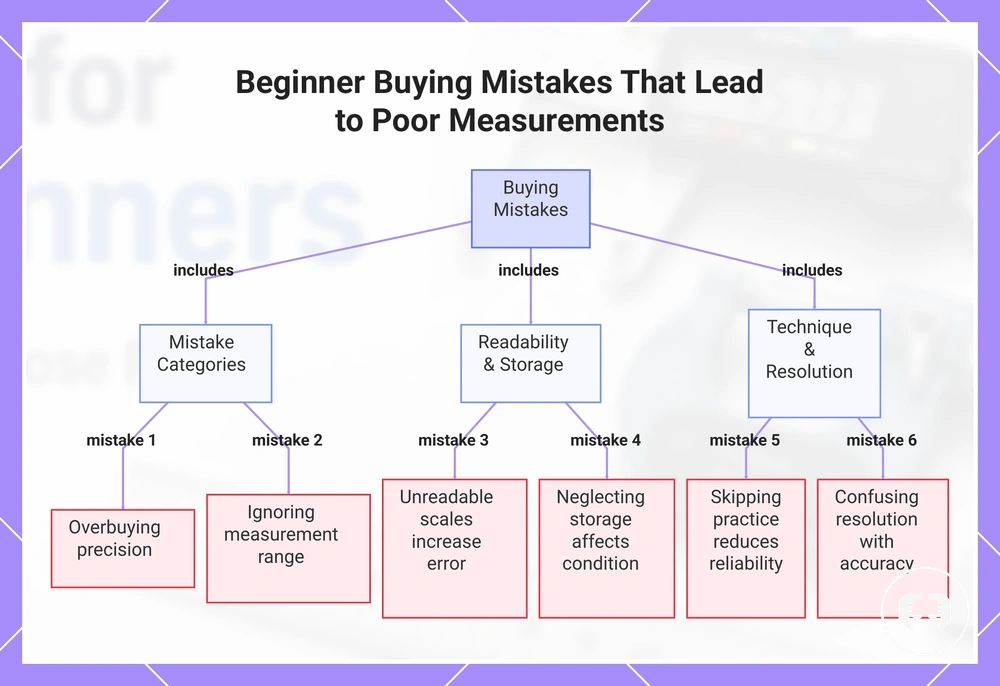
Beginner Buying Mistakes That Lead to Poor Measurements
Buying mistakes can increase the risk of poor measurements when the selected tool does not match the measurement task, reading method, or realistic accuracy needs. A beginner tool should fit the workpiece, the required measurement range, and the user's ability to read and handle it. Choosing the wrong tool can reduce measurement reliability before measuring even begins.
Many buying mistakes can be prevented by matching the tool to the work instead of focusing on specifications alone. Beginner Buying Mistakes That Lead to Poor Measurements become easier to avoid when each purchase decision includes a clear prevention step. The following points connect common mistakes to their effect on measurement reliability and practical prevention.
- Overbuying precision: Paying for more precision than the task requires can increase cost and waste; prevent this by matching the tool to realistic accuracy needs.
- Ignoring measurement range: A tool with an unsuitable measurement range may produce poor measurements; prevent this by confirming the required range before choosing.
- Choosing unreadable scales: Difficult-to-read scales or displays can increase reading error; prevent this by selecting a tool with clear readability.
- Neglecting storage: Poor storage may affect long-term tool condition; prevent this by protecting the tool when it is not in use.
- Skipping practice: Limited practice can reduce measurement reliability even with a suitable tool; prevent this by developing consistent measuring technique.
- Confusing display resolution with accuracy: Fine display resolution does not automatically mean greater accuracy; prevent this by considering the measurement task, tool quality, and technique together.
If a tool displays finer measurement increments, the reading may still be unreliable when the tool is poorly matched to the task or used inconsistently. Display resolution supports reading detail, while accuracy also depends on measurement fit and practice.
The most practical buying decision is one that matches fit, readability, and realistic accuracy needs instead of unnecessary specifications. After choosing a suitable tool, continue with using measuring tools correctly to build consistent measuring habits.
This chart shows common buying mistakes, their effect on measurement reliability, and practical prevention steps.