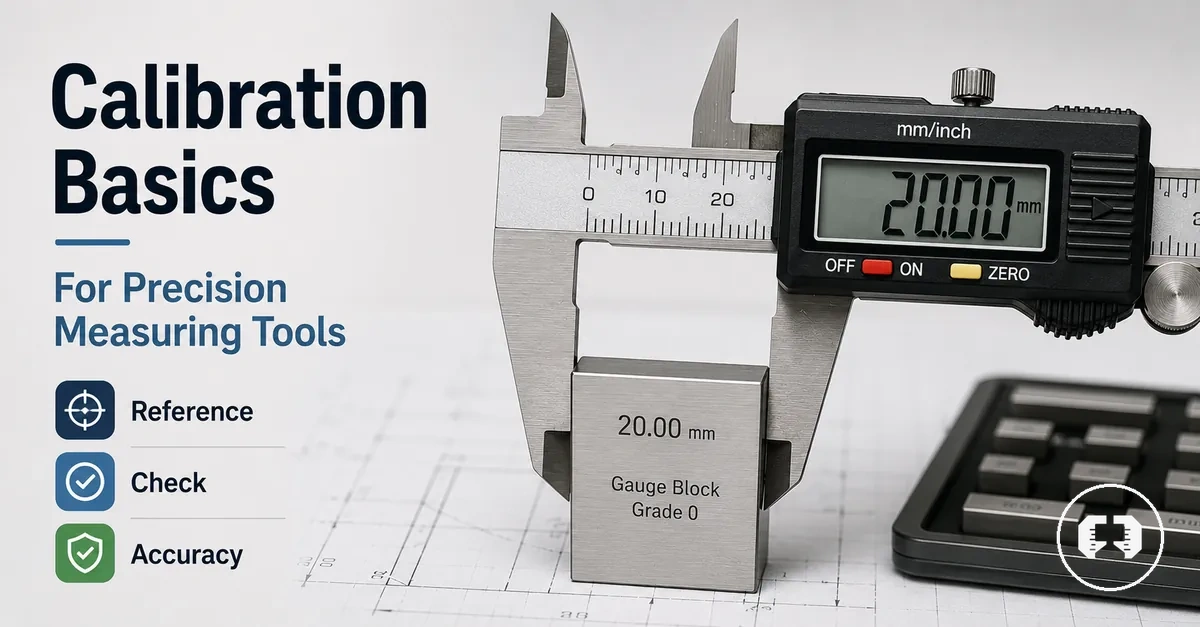
Precision Measuring Tool Calibration Basics
Calibration is a maintenance check that compares precision measuring tools against a reference standard to understand whether the measuring instruments still support trustworthy measurement. For a caliper, micrometer, or similar tool, the calibration check connects the tool reading to a known reference such as a gauge block. The purpose is to support accuracy and tolerance decisions, not to treat calibration as a repair process.
A measuring tool may need calibration after regular use, environmental exposure, visible damage, or a failed verification check. The same tool can also behave differently depending on the work tolerance, the reference condition, and whether adjustment is possible. A basic measurement check should therefore consider tool condition, references, and tolerance before any confidence decision is made.
Calibration helps separate a questionable reading from a tool condition problem, a reference problem, or a possible adjustment need. This article keeps calibration focused on maintenance and measurement confidence, while general care, reading technique, and replacement decisions remain separate topics. The next section explains what calibration means before moving into references, intervals, and failed-check logic.
What calibration means for precision measuring tools
Calibration is the process of checking precision measuring tools against a known reference to determine whether their readings remain within an acceptable range. It compares a measuring instrument with a reference standard so that reading accuracy can be evaluated with appropriate confidence. This comparison links calibration directly to a known reference.
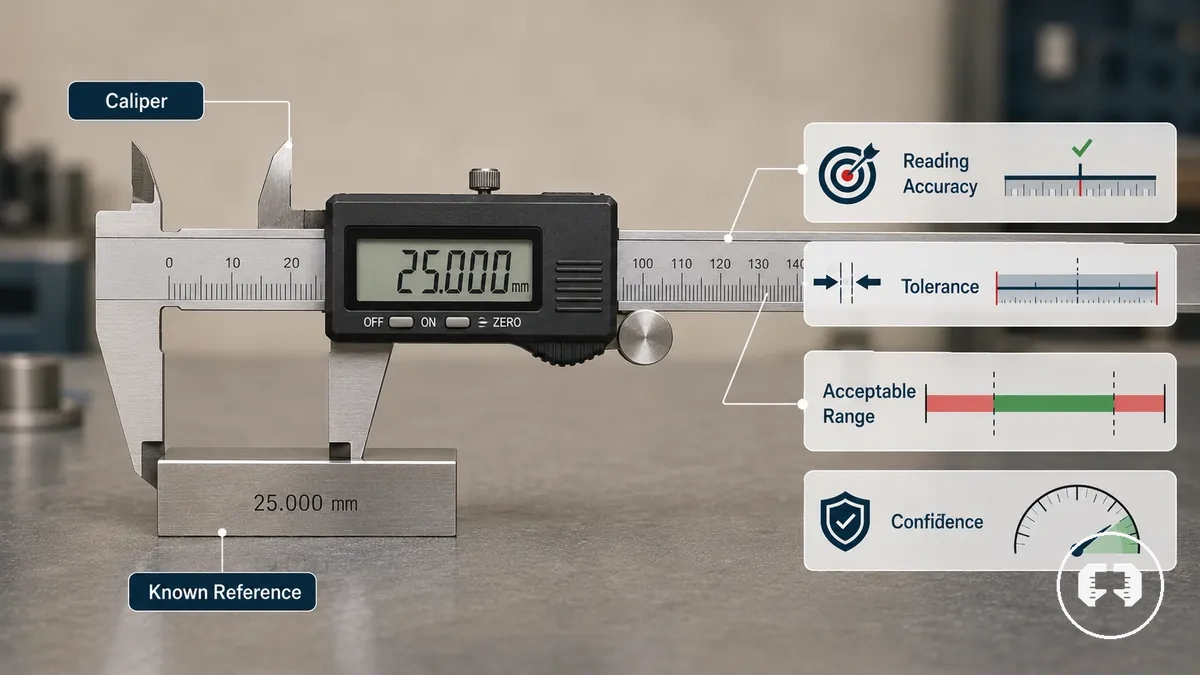
Calibration helps determine whether a measuring tool continues to produce readings that are suitable for the required tolerance. The result may indicate that the tool remains within an acceptable range or that an adjustment or correction decision should be considered, depending on the observed deviation. An acceptable range does not mean perfect accuracy, but it can provide greater confidence in measurement decisions.
A caliper or micrometer may be checked against a reference standard such as a gauge block to compare its reading with a known value. This simple comparison illustrates the purpose of calibration without describing the full procedure. For broader context, see the precision measuring tools guide.
Calibration, verification, and adjustment differences
Calibration, verification, and adjustment describe different relationships between a measuring tool, a reference, and a correction decision. Calibration compares a tool with a reference to identify deviation, verification confirms whether the result meets a pass-or-fail tolerance condition, and adjustment corrects the tool only when its design allows adjustment. Distinguishing these terms helps prevent maintenance decisions from being overstated or confused.
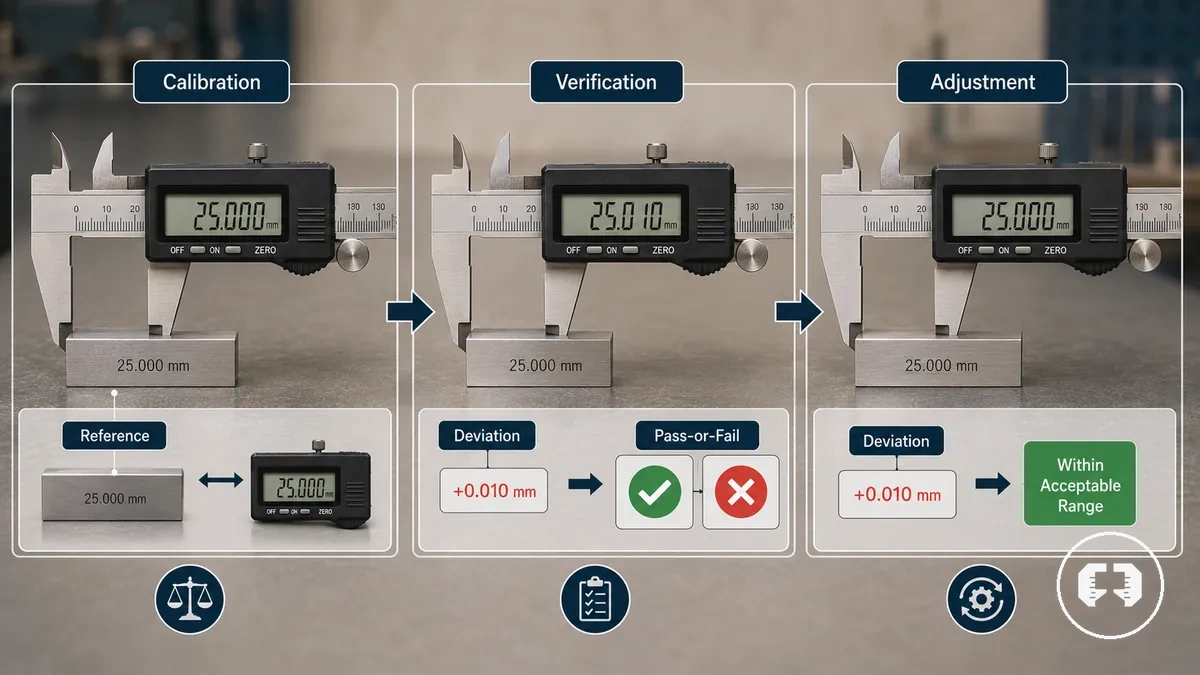
Calibration is the process of comparing a measuring tool with a reference to evaluate measured deviation and create a calibration record where appropriate. Verification determines whether the measured result satisfies a pass-or-fail tolerance requirement. Adjustment is a correction that may reduce deviation, but only if the measuring tool supports adjustment. The comparison below highlights the different purpose of each term.
| Term | Main purpose | Typical outcome |
|---|---|---|
| Calibration | Measure deviation against a reference. | Calibration record and measurement evaluation. |
| Verification | Confirm pass-or-fail against tolerance. | Confirmation of whether the tool meets the required condition. |
| Adjustment | Correct deviation when the tool allows adjustment. | Corrected setting that may require another verification or calibration check. |
A failed check does not automatically require replacement. Depending on the measured deviation, tool design, and condition, the next step may involve recalibration, adjustment, repair, or replacement, followed by another verification when appropriate.
Calibration standards, references, and traceability
Calibration standards are reference standards used to compare precision measuring tools with a known value. A reference standard provides a known or nominal value that allows the calibration result to be evaluated instead of relying only on the measuring tool. This relationship between the tool and the reference is the foundation of calibration confidence because the standard establishes the known value for comparison.
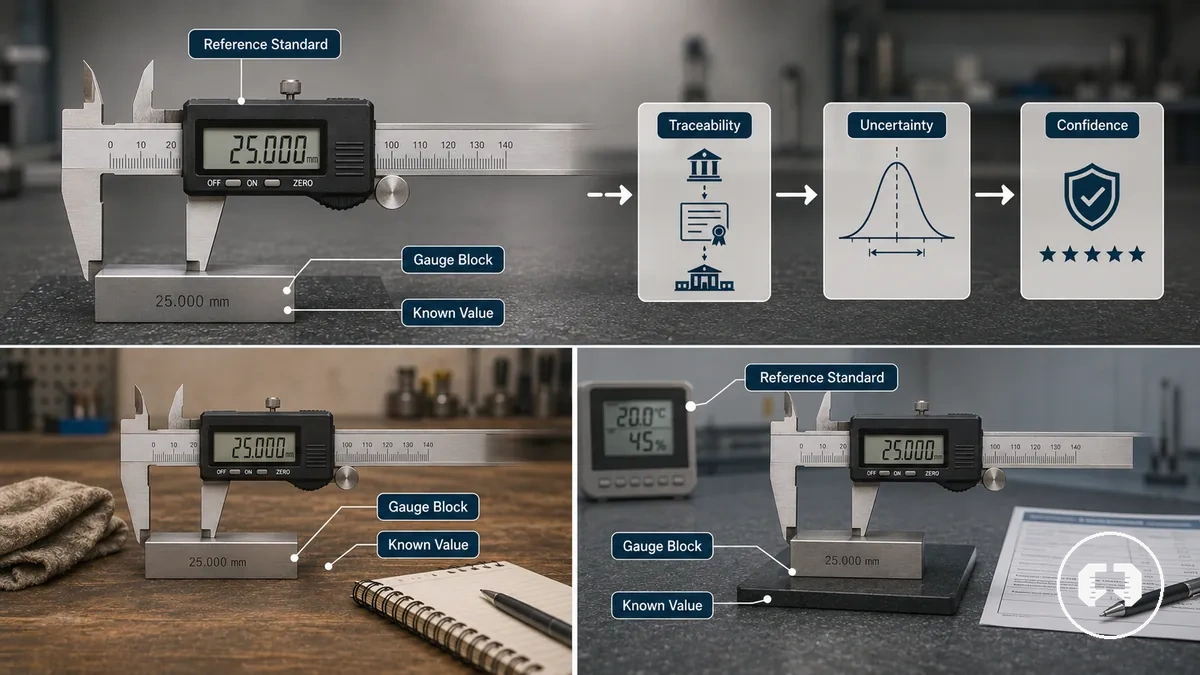
An informal workshop check may use a gauge block or setting standard with a known dimension to assess whether a measuring tool appears to read correctly. A controlled professional calibration typically places greater emphasis on documented reference standards, traceability, and uncertainty. Although both approaches compare a tool with a reference, an informal check should not be treated as equivalent to a controlled professional calibration.
Traceability links a calibration standard to documented reference values that support confidence in the calibration result. Uncertainty describes the limits associated with the comparison rather than guaranteeing an exact measurement. Together, the reference standard, nominal value, traceability, and uncertainty help determine how much confidence can reasonably be placed in a calibration result.
| Reference type | Primary role | Confidence consideration |
|---|---|---|
| Gauge block or setting standard | Provide a known or nominal value for comparison. | Confidence depends on the suitability and condition of the reference. |
| Traceable reference standard | Support calibration using documented reference values. | Confidence is influenced by traceability records and stated uncertainty. |
Gauge blocks and setting standards
Gauge blocks and setting standards are reference tools used to compare a measuring instrument with a known dimension during calibration checks. They provide a stable reference value so a caliper or micrometer reading can be evaluated against a known dimension. The checklist below highlights the main conditions that support a reliable reference comparison.
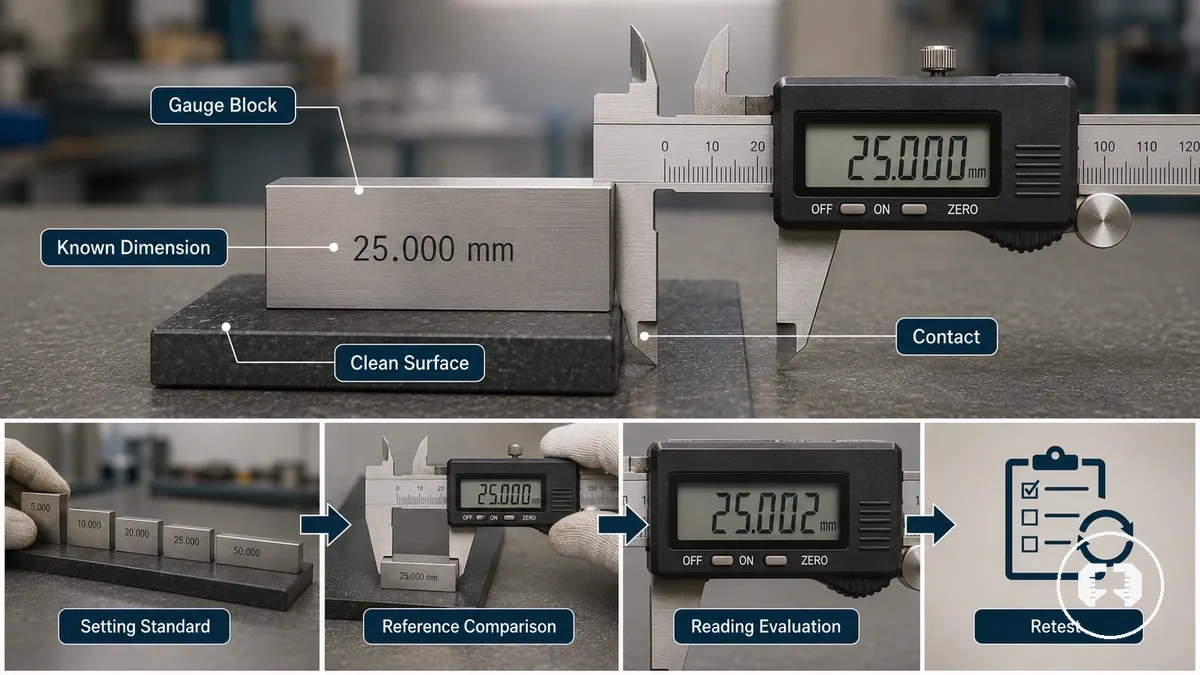
- Check reference cleanliness and ensure the contact surfaces are clean before taking a reading.
- Confirm proper contact between the gauge block or setting standard and the measuring tool.
- Use a size match that corresponds to the known dimension being checked.
- Consider the surface condition of the reference, including any stated grade or uncertainty where applicable.
- Compare the measured reading with the known dimension and note any deviation.
- If the comparison indicates unexpected deviation, perform a retest before drawing a conclusion.
For example, a caliper may be checked against a gauge block with a known dimension to compare its reading with the reference value. A micrometer may be checked against an appropriate setting standard in the same way, provided the contact surfaces are clean and the reference is suitable for the comparison. The result may indicate a pass, identify a deviation, or suggest that a retest is appropriate.
Tolerance, uncertainty, and calibration records
Tolerance, uncertainty, and calibration records make calibration results useful by connecting a measured deviation with the decision that follows. A calibration record preserves the relationship between the measuring tool, the reference, the measured deviation, and the observed result so the outcome can support maintenance history, traceability, and future decisions rather than acting as a simple reading.
Tolerance defines the acceptable limit for a measurement, while uncertainty describes the confidence associated with the measurement result. A measured deviation should be evaluated against the tolerance requirement together with the recorded uncertainty rather than in isolation. For a broader explanation of these relationships, see accuracy and tolerance concepts. Together, these criteria help determine whether the appropriate action is to accept, monitor, or escalate the decision. A calibration record supports maintenance history and traceability, but it does not by itself prove suitability for every tolerance requirement.
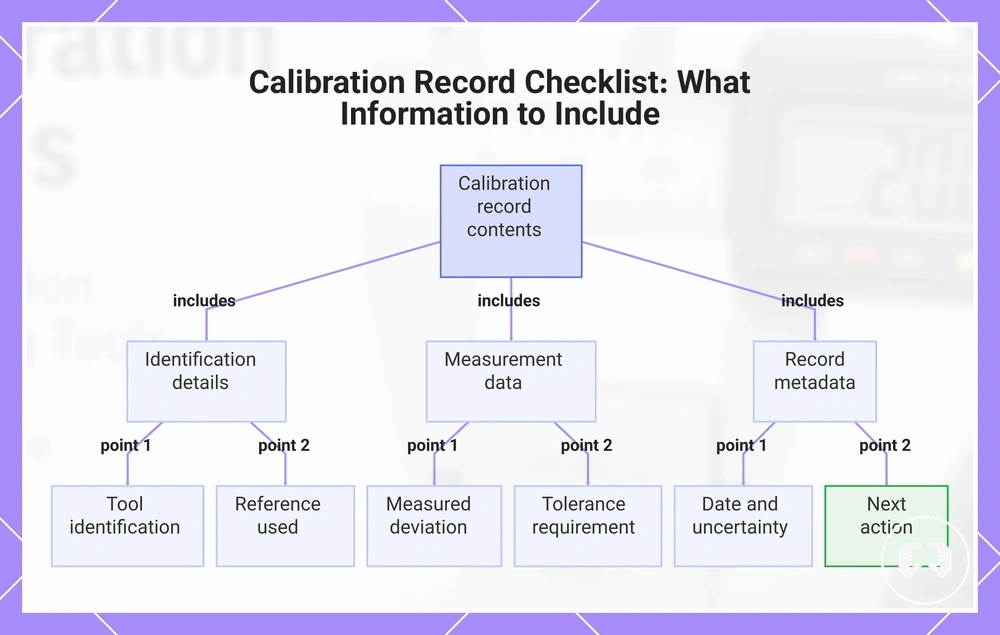
The checklist below outlines the information that is commonly useful to preserve in a calibration record or calibration log.
- Tool identification or tool type.
- Reference used for the comparison.
- Measured deviation.
- Tolerance requirement or acceptable limit.
- Record date and uncertainty or record note.
- Next action: accept, monitor, or escalate.
This chart shows the essential information that should be preserved in a calibration record to support maintenance history, traceability, and decision-making.
Tool condition checks before calibration
Tool condition checks should be completed before a calibration check because the condition of the measuring tool can influence the reading independently of calibration. A quick pre-check helps determine whether the tool is clean, stable, undamaged, and suitable for comparison with a reference standard. If these conditions are overlooked, tool condition can distort calibration results.
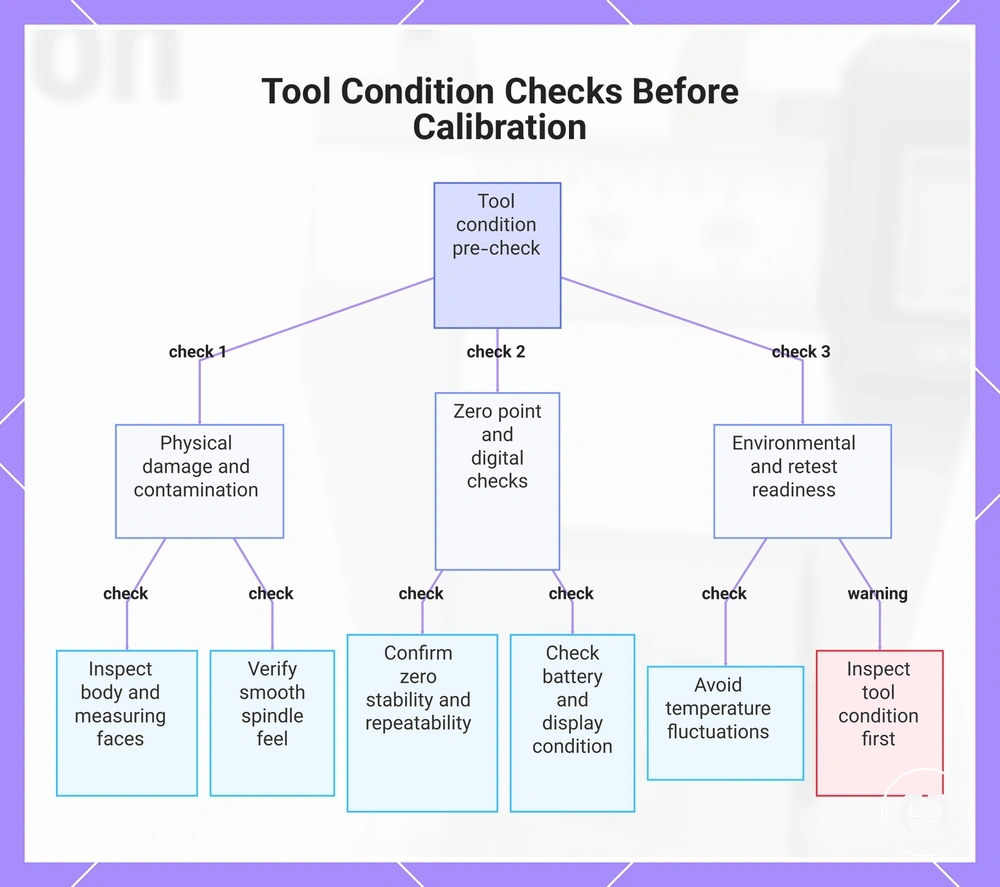
The checklist below helps separate tool condition from the measurement result so that obvious issues can be identified before calibration.
- Inspect the tool body, measuring faces, or contact surfaces for contamination, burrs, or visible damage.
- Confirm the zero point is stable and repeatable before comparing with a reference.
- Check the battery and display condition on digital measuring tools.
- Ensure the slide feel or spindle feel is smooth and consistent without unusual resistance.
- Look for visible damage that could affect alignment or contact.
- Verify environmental stability by avoiding unnecessary temperature changes during the calibration check.
- Confirm the tool is ready for a retest if an unexpected reading is observed.
When a calibration check produces an unexpected result, inspect the tool condition before assuming the calibration has changed. Dirt on the measuring faces, a burr on the contact surface, temperature changes, or visible impact damage can produce a false reading that resembles a calibration problem. Separating tool condition from the measurement result helps identify whether the issue is with the tool or the comparison.
A brief condition check supports more reliable calibration results without replacing routine maintenance. For guidance on ongoing maintenance practices, see care and storage for measuring tools.
This chart shows the key checks to perform on a measuring tool before calibration to separate tool condition from measurement results.
Clean measuring faces and contact surfaces
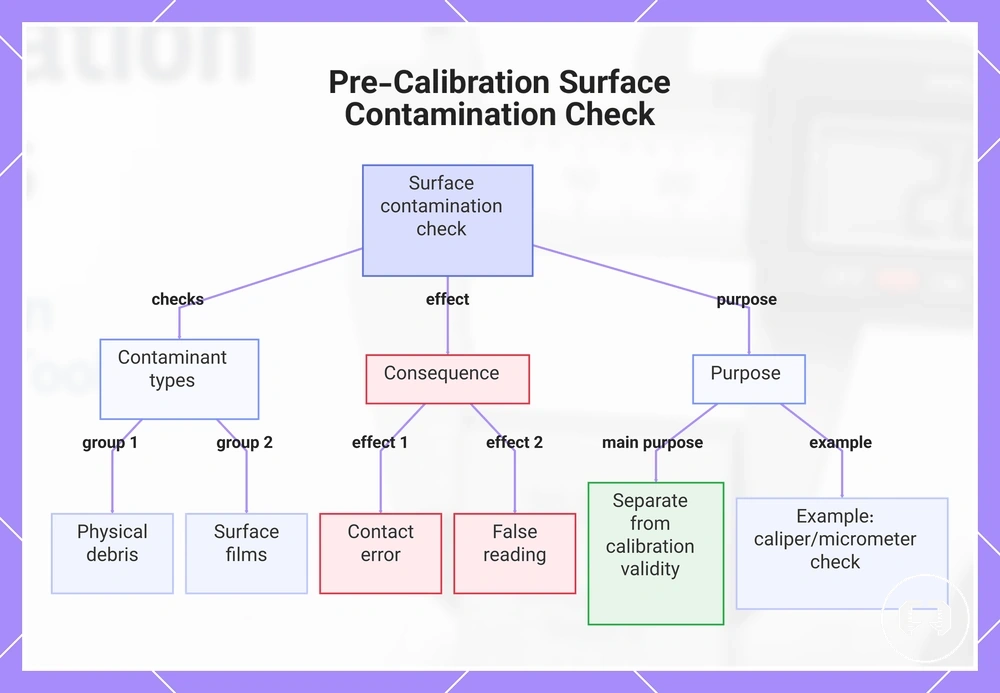
Clean measuring faces and contact surfaces should be checked before evaluating any calibration reading because surface contamination can interfere with proper contact. Dirt, oil, a burr, a chip, or rust on the measuring faces can create a contact error that may lead to a false reading. Identifying these conditions first helps separate surface contamination from calibration validity.
The checklist below highlights the surface conditions that should be reviewed before interpreting a measurement.
- Dirt on the measuring faces can prevent full contact and contribute to a false reading.
- Oil on the contact surfaces may reduce consistent contact between the tool and the workpiece.
- A burr can create a contact error by preventing proper seating.
- A chip on the measuring surface may reduce contact consistency and influence the reading.
- Rust on the contact surfaces can interfere with smooth, repeatable contact.
Even a small contaminant can affect a contact measurement when it lies between the measuring faces and the workpiece. For example, a caliper or micrometer check may appear inaccurate if a small burr or particle prevents full contact, even though the tool itself may not require calibration. This local surface check helps distinguish contact-related effects from calibration results.
This chart shows the common surface contaminants to check, their effects on measurement accuracy, and the purpose of distinguishing contamination from calibration errors.
Zero point stability and visible damage
Zero point stability should be confirmed before relying on a calibration check because consistent zero behavior supports confidence in the result. A zero point that returns to the same position after opening and closing improves repeatability, while unexpected changes should be investigated before judging calibration. Stable zero point behavior increases confidence in the calibration check.
- Zero point repeatability: Confirm the zero point returns consistently after opening and closing. If it does not, perform a retest.
- Visible damage: Inspect for bent jaws, worn anvils, or impact marks that could influence contact or alignment.
- Display instability: An unstable display on a digital tool may justify a retest or further escalation.
- Looseness: Excessive movement can reduce repeatability and should be investigated before evaluating measurements.
- Boundary cue: A zero change can result from tool condition, handling, temperature, or measurement technique, so it should not automatically be treated as a calibration failure.
If repeatability remains inconsistent after basic condition checks, repeat the zero point check under stable conditions and inspect for visible damage. Persistent zero instability, bent jaws, worn anvils, display instability, or impact marks may indicate that further evaluation is appropriate rather than relying on a single reading. When repeated retests continue to show unstable zero behavior, escalation may be appropriate. If recurring symptoms resemble broader measurement errors and drift, investigate those conditions before interpreting the calibration result.
Basic calibration checks for calipers and micrometers
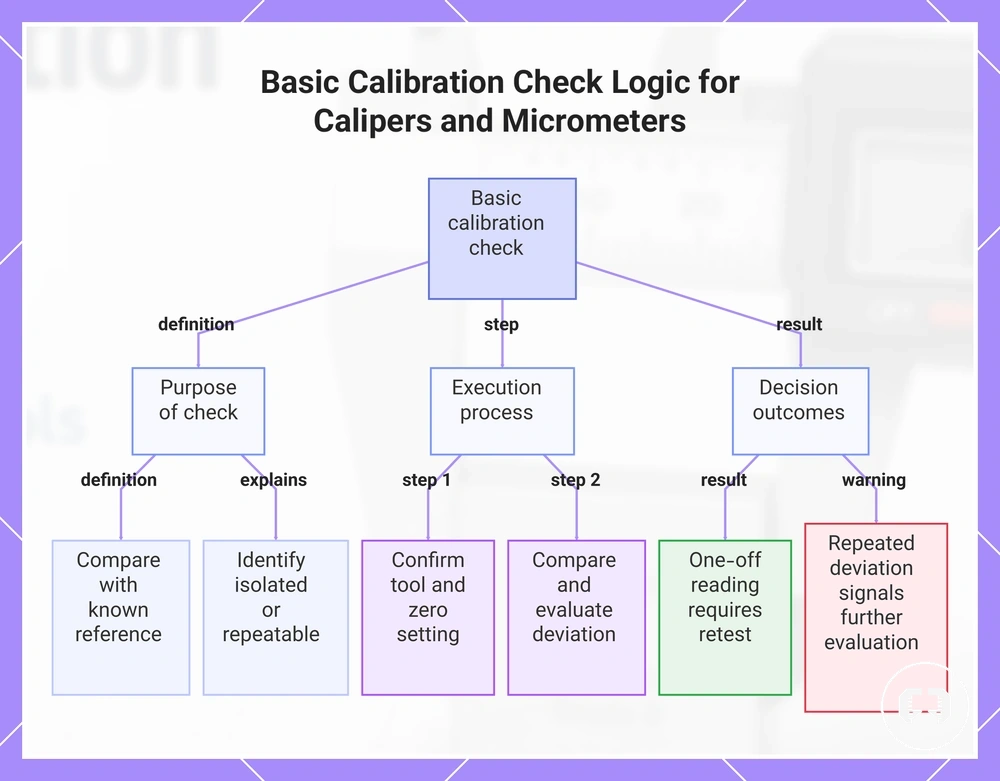
A basic calibration check for a caliper or micrometer compares tool readings with a known reference using repeatable contact before any tolerance judgment is made. This basic check helps identify whether an unexpected reading is isolated or repeatable while remaining distinct from a formal calibration process. The same check logic applies to both calipers and micrometers.
If a reading appears questionable, first confirm the tool condition, then compare it with a known reference dimension using a consistent contact method. Evaluate any reading deviation against the required tolerance rather than relying on a single measurement. Repeated deviation across multiple reference dimensions may justify further evaluation, while a one-off reading may only require a retest. This basic sequence keeps measurement decisions grounded in known references.
- Choose the correct caliper or micrometer, confirm the zero setting, and prepare a suitable reference dimension before beginning the calibration check.
- Place the caliper jaws or the micrometer anvil and spindle against the reference using repeatable contact, then record the reading.
- Compare the reading deviation with the reference dimension and make a tolerance judgment appropriate for the measurement requirement.
- Repeat the check at additional reference dimensions if an unexpected deviation appears. Consistent results increase confidence, while repeated deviation may justify a retest or further evaluation.
- If similar deviation continues across multiple reference points after repeated checks, treat it as a decision signal for further assessment rather than relying on a single measurement.
If a caliper or micrometer produces one unexpected reading but repeated checks remain consistent, the result may reflect a one-off measurement issue rather than a calibration problem. These basic checks support routine measurement decisions but should not be treated as a substitute for a formal calibration process.
This chart shows the purpose, process, and decision outcomes of a basic calibration check for calipers and micrometers, helping to identify whether an unexpected reading is isolated or repeatable.
Caliper zero, jaw, inside, outside, and depth checks
A caliper check starts by confirming the caliper zero before evaluating each measuring function against a known reference. Each measuring surface should be checked according to the measurement it performs so that outside jaws, inside jaws, and the depth rod can be assessed separately. This local check covers the caliper zero, outside jaws, inside jaws, and depth rod.
If a reading appears inconsistent, compare each measuring function with an appropriate reference while keeping reference contact consistent. Use light, repeatable pressure, maintain jaw alignment, and ensure the depth rod is fully seated because these conditions can influence reading deviation. Repeat the same check before judging the result so the outcome is based on repeatability rather than a single measurement.
- Close the caliper fully, confirm the caliper zero, then open and close it again to check zero repeatability before measuring.
- Use the outside jaws against a known dimension with consistent reference contact, then compare any reading deviation with the required tolerance.
- Check the inside jaws against an appropriate internal reference, paying attention to contact and jaw alignment before interpreting the reading.
- Place the depth rod on a stable reference surface and ensure full seating before comparing the measured depth with the reference value.
- Repeat the measurement using the same contact method. If reading deviation remains consistent, consider the result for further evaluation based on repeatability and tolerance rather than a single reading.
Micrometer anvil, spindle, thimble, and standard checks
A micrometer check starts by comparing the measuring faces with a known standard using repeatable contact. Each component should be checked according to its measuring function so the anvil, spindle, thimble, ratchet, and known standard are evaluated separately before interpreting the reading. This local check focuses on the anvil, spindle, thimble, ratchet, and known standard.
If a micrometer produces an unexpected reading, first inspect the contact condition and movement feel before comparing it with the known standard. Use consistent ratchet force, keep the spindle and anvil clean, and note that spindle cleanliness or anvil wear may influence deviation. Repeat the comparison before judging the result so the outcome is based on repeatability and repeatable contact.
- Clean the anvil and spindle contact surfaces, then confirm they close smoothly without debris affecting the contact condition.
- Place the known standard between the measuring faces and close the micrometer using consistent ratchet force.
- Turn the thimble through the ratchet and confirm the spindle movement feels smooth before comparing the reading with the known standard value.
- Compare any deviation with the required tolerance. If contact force, spindle cleanliness, or anvil wear may have influenced the reading, repeat the check before drawing a conclusion.
- Repeat the measurement using the same standard and contact method. Consistent results improve confidence, while repeated deviation may justify further evaluation.
How calibration supports measurement accuracy
Calibration supports measurement accuracy by comparing a measuring tool with a known reference so that its calibration status and any known deviation can be understood. This comparison can improve measurement confidence and repeatability, but calibration alone does not guarantee accurate measurements because tool condition, reading technique, and measurement conditions also influence the result.
A known deviation is the difference observed when a measuring tool is compared with a reference, while a confidence range describes the uncertainty associated with that comparison. Together, calibration status, known deviation, and confidence range help determine how much confidence can be placed in a measurement and support a tolerance decision. For a broader explanation of these relationships, see accuracy and tolerance concepts.
The factors below show how calibration supports measurement accuracy alongside tool condition, reading technique, repeatability, and tolerance decisions.
| Factor | Effect on measurement accuracy |
|---|---|
| Calibration status | Provides information about known deviation and confidence range. |
| Tool condition | Can influence repeatability and the reliability of the measurement. |
| Reading technique | May affect the consistency of the observed reading. |
| Tolerance decision | Depends on calibration information together with the required acceptable range. |
Calibrated tool versus accurate measurement: A calibrated tool has documented calibration status and a known deviation, but an accurate measurement still depends on reading technique, tool condition, and the conditions under which the measurement is taken.
Calibration intervals for measuring tools
A calibration interval depends on how measuring tools are used, the accuracy risk of the work, and the conditions in which they operate. Calibration intervals organize use frequency, tool condition, environment, maintenance history, and tolerance risk into a practical decision rather than following one fixed schedule. There is no single universal calibration interval for every measuring tool.
For example, a measuring tool used occasionally for light workshop tasks may not require the same calibration interval as one used regularly for tolerance-critical work. Higher use frequency, demanding environments, impact exposure, or tighter work tolerance can justify closer monitoring and a shorter interval, while lighter use with stable record history may support a longer review period. The appropriate interval depends on both use frequency and tolerance risk.
| Condition | Calibration interval consideration | Possible interval outcome |
|---|---|---|
| Low use frequency with stable record history | Review maintenance history and previous calibration results. | Longer interval may be appropriate. |
| Typical workshop use | Consider normal use frequency, work tolerance, and operating environment. | Standard interval may be suitable. |
| High use, impact exposure, or demanding environment | Monitor for past drift and increased tolerance risk. | Shorter interval may be appropriate. |
| Annual check requirement | Follow workplace or quality system requirements where they apply. | An annual check can be part of a qualified schedule but is not a universal rule. |
If measurement results begin to change unexpectedly or record history indicates recurring past drift, review the calibration interval instead of relying only on the existing schedule. The next decision may involve adjusting the calibration schedule or determining when to recalibrate measuring tools based on the measuring tool's condition, use, and measurement requirements.
Use frequency, work tolerance, and environment
Calibration check frequency depends on how a measuring tool is used, the work tolerance it supports, and the operating environment in which it is used. These local criteria help determine whether additional monitoring or a shorter review interval may be appropriate instead of relying on a universal schedule. The primary decision factors are use frequency, work tolerance, and environment.
For example, a measuring tool used occasionally for low-risk measurements may not require the same check frequency as one used regularly in production or for tighter tolerance work. As measurement risk increases or operating conditions become more demanding, the calibration interval may require closer monitoring or a shorter review period rather than a fixed schedule.
- Higher use frequency may justify a shorter check frequency because measurement risk can increase with repeated use.
- Tighter work tolerance may justify closer monitoring when small deviations could affect measurement decisions.
- More demanding operating conditions, including temperature, dust, and moisture, may justify additional monitoring where they could influence measuring tool performance.
- Repeated impact or vibration may act as a monitoring signal that supports reviewing the calibration interval.
- Poor handling quality may increase the need for inspection or calibration review when tool condition becomes uncertain.
- Stable operating conditions with careful handling may support a longer review interval when record history and measurement risk remain consistent.
Annual checks and shorter interval conditions
Annual checks are a common reference point for calibration maintenance, but they are not a universal schedule for every measuring tool. The appropriate timing depends on use, work tolerance, environmental exposure, and measurement risk, so a shorter interval may be appropriate under some conditions. Annual checks should be treated as a maintenance reference rather than a fixed rule.
If a measuring tool is exposed to conditions that increase the likelihood of measurement change, review the calibration interval instead of relying only on the routine schedule. Heavy use, impact, a failed check, high tolerance work, or challenging environmental exposure may justify a shorter interval or further evaluation. The appropriate decision depends on the measuring tool, its operating conditions, and the associated measurement risk, and may support maintaining, shortening, or escalating the calibration schedule.
- Annual checks: Can provide a common maintenance reference point when supported by the tool's use and record history.
- Heavy use or impact: May justify a shorter interval or additional monitoring after the event.
- Failed check: Can indicate the need to shorten the interval or escalate for further evaluation.
- High tolerance work or environmental exposure: May require closer monitoring because measurement risk can be higher.
- Formal schedule: When a workplace, standard, or quality system applies, follow the relevant formal schedule rather than relying only on a general annual reference.
Out-of-tolerance calibration results
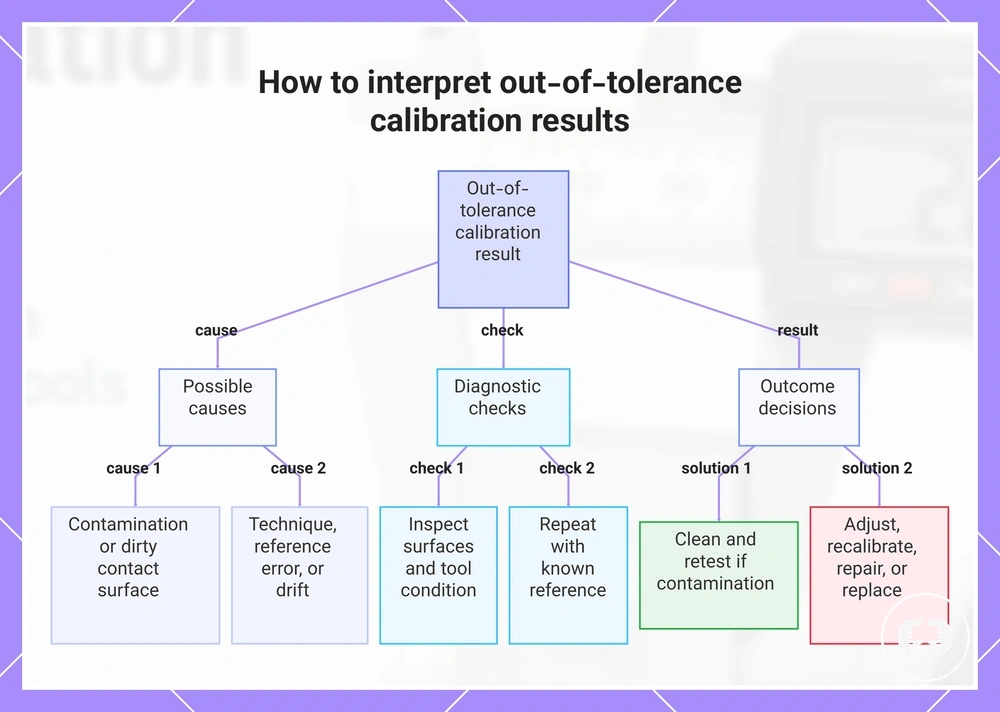
An out-of-tolerance result from a failed calibration check should be treated as a diagnostic finding rather than an immediate reason to replace a measuring tool. The next step is to identify whether the result is caused by contamination, measurement technique, the reference, tool condition, or true measurement drift before deciding how to proceed. Avoid assuming that replacement is the only outcome.
If the result cannot be explained by an obvious cause, repeat the comparison using a reference with suitable reference confidence and confirm the tool condition before interpreting the deviation. A dirty contact surface may produce a false reading, while a single inconsistent reading may only require a retest with consistent technique. If repeated deviation appears across known references, investigate whether the cause is contamination, technique, reference error, damage, or measurement errors and drift before deciding on the next maintenance step.
- Inspect the measuring surfaces and tool condition, then remove contamination if present and perform a retest.
- If only one inconsistent reading occurs, repeat the measurement using the same reference and consistent technique before drawing a conclusion.
- If repeated deviation remains across known standards, compare the result with the applicable tolerance requirement and consider whether adjustment is appropriate.
- If adjustment is not suitable or the deviation persists, the next step may be to recalibrate professionally, repair, or replace the measuring tool, depending on the diagnostic result.
When a dirty contact surface explains the result, cleaning and retesting may be enough to separate contamination from a true tolerance failure. When only one reading is inconsistent, repeat the check before treating the deviation as a maintenance issue. When repeated deviation appears across known standards, the outcome may require retest, adjustment, service, repair, or replacement.
An out-of-tolerance result supports a maintenance decision only after the diagnostic checks are complete. When repeated deviation, tool condition, and reference confidence indicate that the issue remains unresolved, review when to recalibrate measuring tools before deciding whether to retest, adjust, arrange professional calibration, repair, or replace the tool.
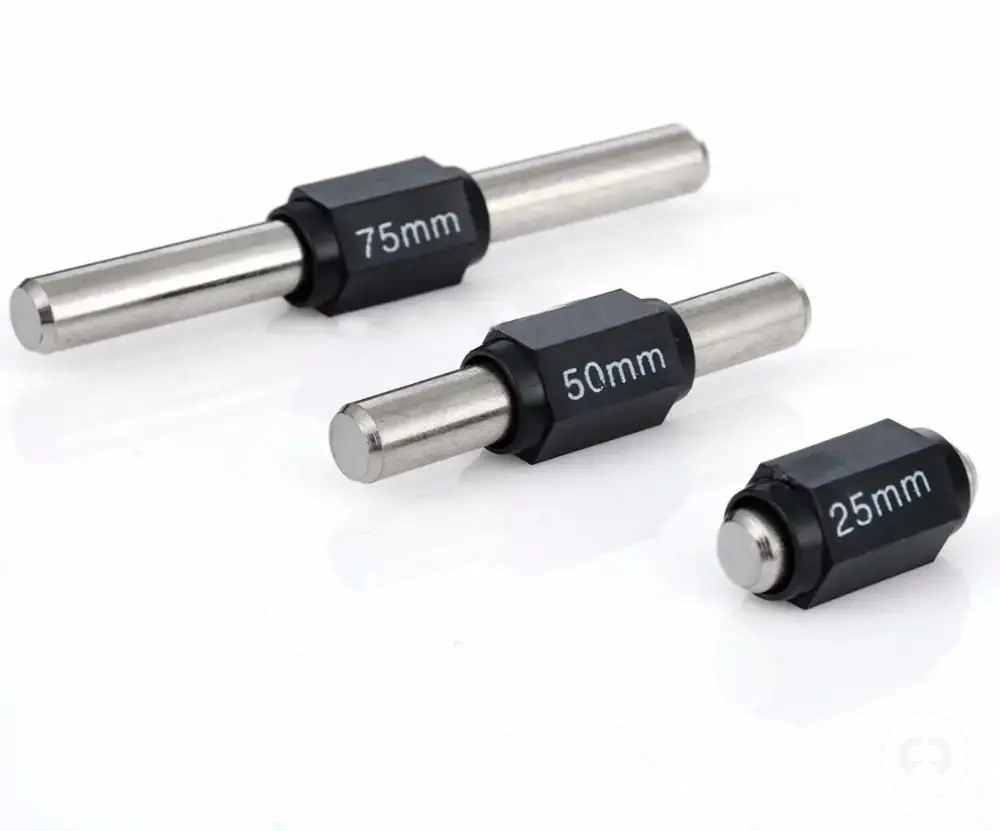
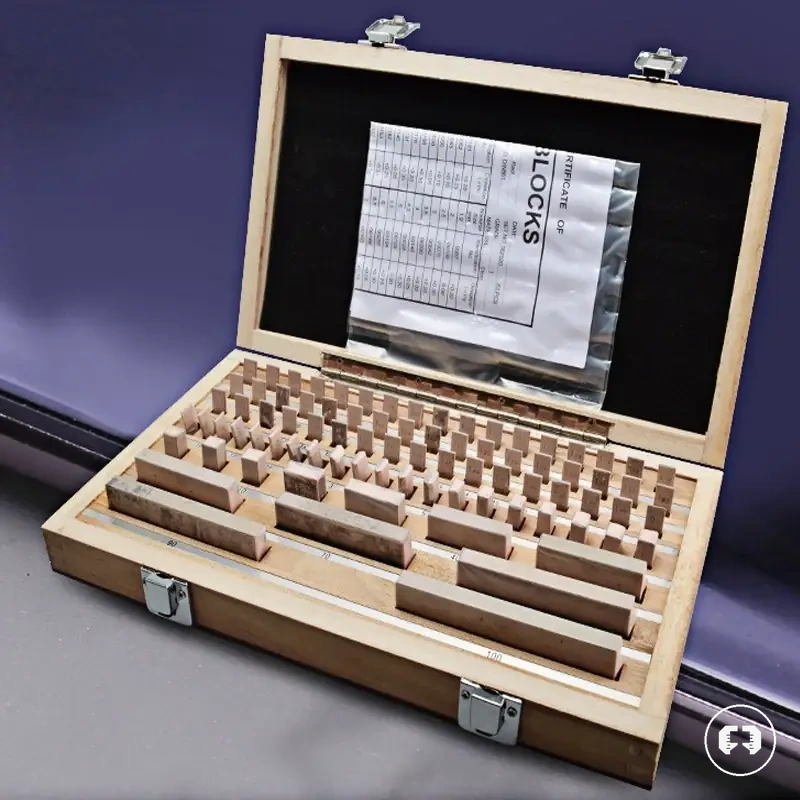
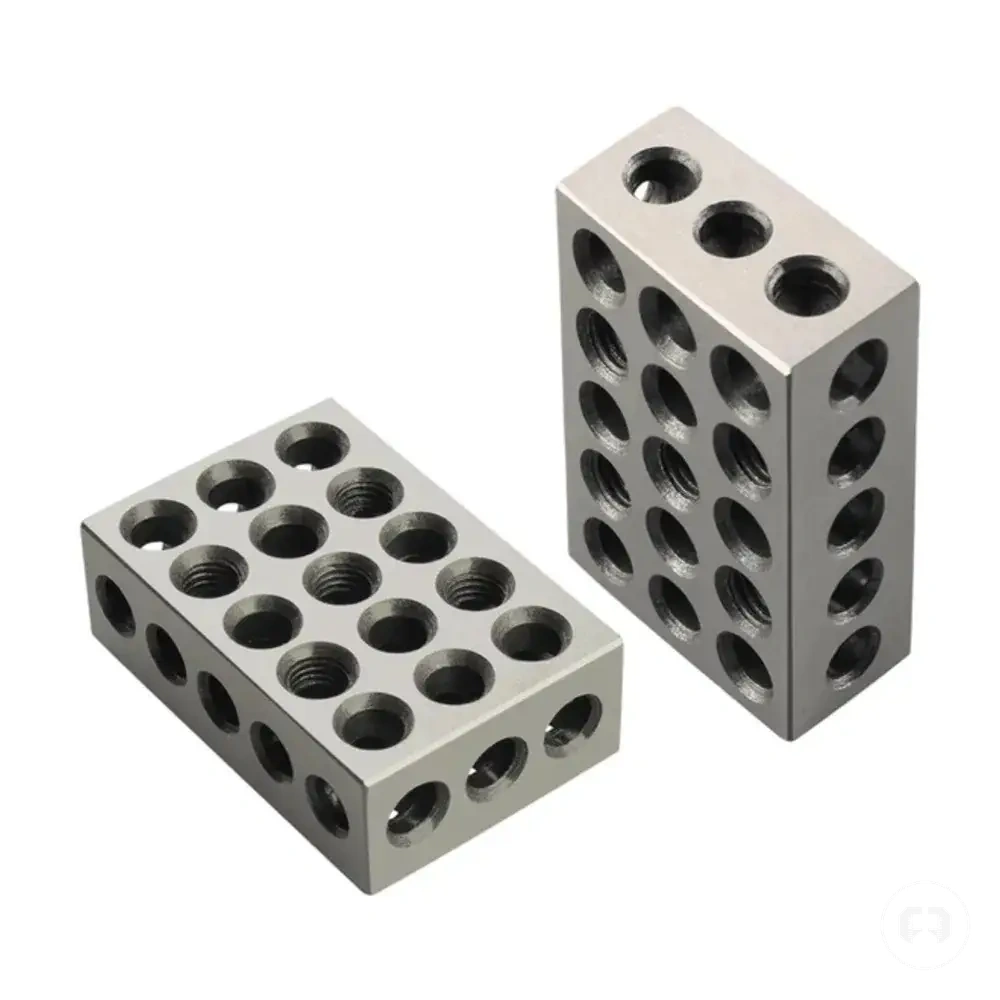
Here are product examples that may make comparison easier. Before buying, always review the compatibility criteria, essential features, and product details.


This chart shows the diagnostic steps and possible causes for an out-of-tolerance calibration result, guiding whether cleaning, retesting, adjustment, or replacement is needed.