
Precision Measuring Tools Maintenance Checklist
Precision measuring tools maintenance is the routine care, cleaning, rust prevention, and storage used to protect measurement faces, moving parts, scales, and contact surfaces. It does not prove accuracy by itself, but it can help preserve repeatability and long-term measurement confidence when the tool type, condition, and workshop conditions are considered.
Contamination, corrosion, impact, and poor storage can make measuring instruments harder to use consistently. Debris or residue on measurement faces may affect contact, moisture and fingerprints can increase rust risk on exposed metal, and loose storage can expose jaws, spindles, or displays to impact. Routine maintenance reduces these risks, but the result still depends on material, environment, use frequency, and whether calibration is also needed.
In a workshop, maintenance should start before the tool is used and continue after the measurement is finished. This precision measuring tools guide connects the maintenance checklist back to the broader selection and use context, so care decisions stay separate from buying, calibration, or repair topics.
Use this checklist as a prevention routine, not as a replacement for calibration or correct measuring technique. The checklist organizes care, cleaning, rust prevention, and storage so each action protects a specific part or condition.
- Check measurement faces before use and remove visible debris or residue with a suitable soft cloth or brush.
- Keep contact surfaces dry after cleaning, especially when moisture, coolant, or fingerprints are present.
- Use rust prevention carefully on exposed metal when appropriate, and remove excess protective oil from areas where residue could affect contact.
- Return each measuring tool to a protective case, storage case, or organizer so tools stay separated and less exposed to impact.
- Watch workshop conditions such as dust, humidity, coolant, and bench clutter because these conditions can change how often maintenance is needed.
- Treat calibration as a boundary check for accuracy, while routine maintenance focuses on cleanliness, condition, storage, and repeatability support.
What Precision Measuring Tool Maintenance Should Protect
Precision measuring tool maintenance protects the parts that directly support reliable measurements, including measurement faces, contact surfaces, scales, displays, and other exposed tool surfaces. Routine maintenance is intended to preserve measurement confidence by reducing contamination, wear, corrosion, and handling damage. The level of protection can vary with the measuring instrument, its condition, the material, and workshop conditions.
What Precision Measuring Tool Maintenance Should Protect depends on the condition of each tool part and the risks it encounters during use and storage. The image below labels the main components and risk conditions so it is easier to see how each part contributes to repeatability and reading confidence.
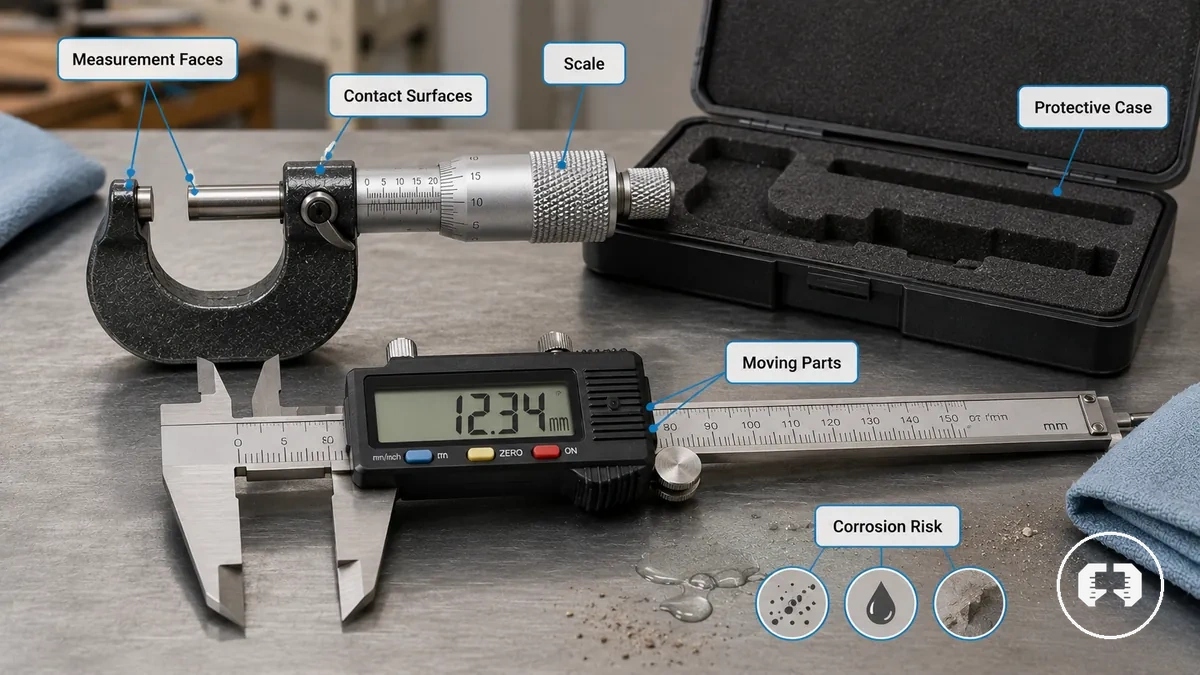
The table summarises how tool parts, their condition, and routine maintenance relate to measurement reliability.
| Entity/part | Attribute/condition | Effect/risk | Maintenance implication |
|---|---|---|---|
| Measurement faces | Debris, residue, or wear | May reduce repeatability during contact measurements | Keep measurement faces clean and inspect them regularly |
| Scale or display | Dirt or reduced visibility | May lower reading confidence | Clean carefully using methods suitable for the measuring instrument |
| Contact surfaces | Contamination or corrosion | Can increase the risk of inconsistent readings | Keep contact surfaces clean, dry, and protected when appropriate |
| Metal surfaces and moving parts | Moisture exposure or corrosion risk | May affect smooth movement over time | Store the tool in a protective case and follow routine care practices |
Routine care protects tool condition and helps reduce avoidable risks, while formal calibration verifies measurement performance rather than replacing maintenance. If measurement confidence remains uncertain after normal care, calibration may be appropriate depending on the tool and its condition. For more about that distinction, see calibration basics.
Handling Checks Before and After Measurement
Handling checks before and after measurement help reduce avoidable damage that may affect precision measuring instruments over time. Careful handling before measurement and after measurement can reduce the risk of contamination, accidental impact, or unnecessary wear, depending on the tool, workpiece, and workshop conditions.
Handling Checks Before and After Measurement verifies that handling conditions are suitable before the tool is used and before it is returned to storage. The image below demonstrates safe handling conditions, including careful grip, protected measuring components, a stable workpiece, and an orderly work area.
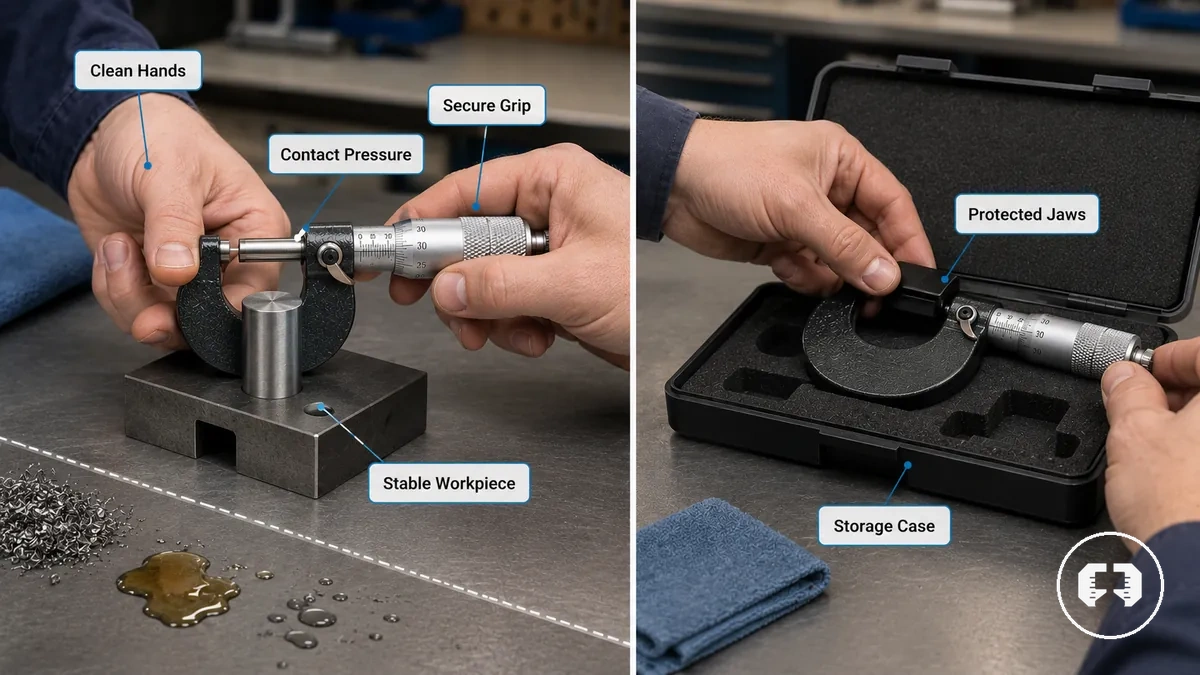
When chips, oil, coolant, or moving workpieces are present, handling risks can increase because contamination or unexpected movement may affect the jaws, spindle, or contact surfaces. This section focuses only on handling conditions that help protect the measuring instrument and does not replace broader measurement guidance. For complete measurement technique, see using measuring tools correctly.
Handling Checks Before and After Measurement helps verify that routine handling conditions support tool protection.
- Before measurement, use clean hands to reduce contamination on contact surfaces.
- Maintain a secure grip to reduce the risk of dropping or striking the measuring instrument.
- Apply controlled contact pressure to help protect the jaws or spindle from unnecessary wear.
- Check that the workpiece is stationary and stable before taking a measurement.
- After measurement, look for chips, oil, or coolant on the jaws, spindle, or contact surfaces before returning the tool.
- Return the measuring instrument to its storage case to help reduce handling damage between uses.
Drops, Shock, and Contact-Surface Protection
Drops, shock, and contact-surface protection help reduce the risk of damage that may affect measuring faces and long-term measurement confidence. Physical shock or impact can affect contact surfaces or moving components, depending on the tool, the force of the impact, and its condition after inspection.
Drops, Shock, and Contact-Surface Protection labels the parts most affected by impact. The image below highlights the body, jaws, anvils, spindle, dial mechanism, display housing, and other contact points that should be checked after physical shock.
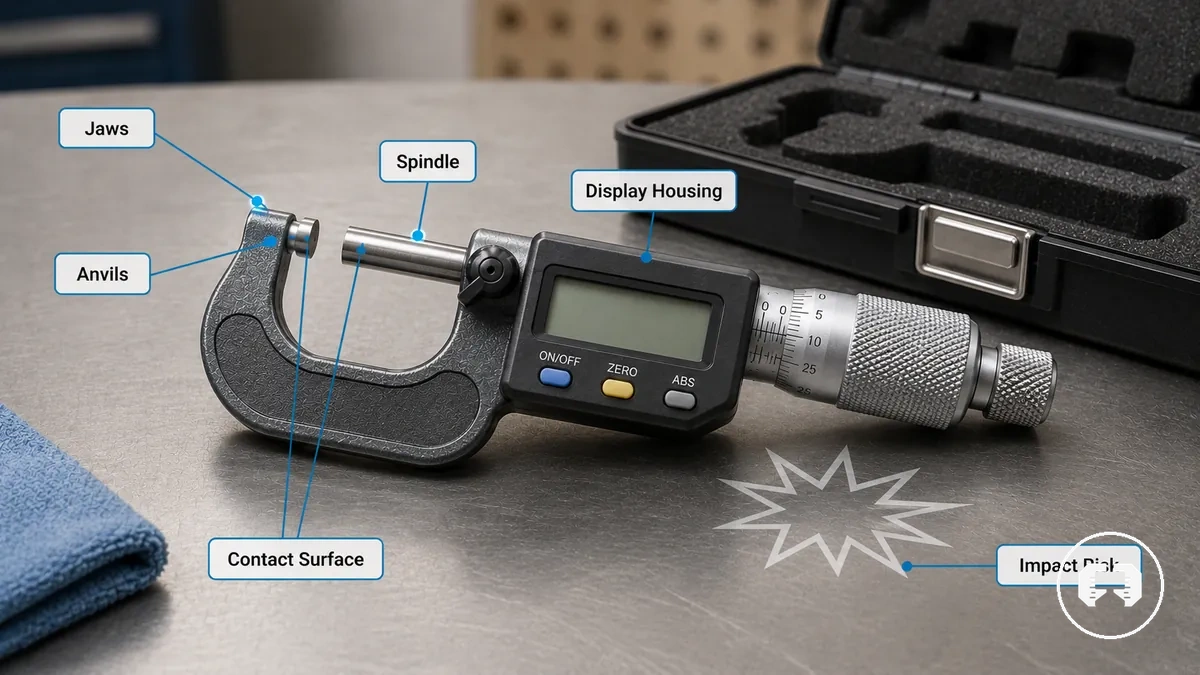
If visible damage affects contact surfaces, movement, or key measuring components, pause measurement use until the tool can be inspected. Cosmetic marks may not affect measurement confidence, but damage to measuring faces or moving parts deserves closer attention.
Drops, Shock, and Contact-Surface Protection helps verify the parts most likely to be affected by impact.
- Inspect the tool body for signs of impact that may indicate a need for further condition checks before use.
- Check the jaws, anvils, and contact surfaces for visible damage that could affect measurement confidence.
- Examine the spindle for dents, bending, or movement that no longer feels smooth, and pause use if visible damage is present.
- Look at the dial mechanism or display housing for cracks, distortion, or other impact-related damage.
- If the tool has experienced a significant drop or shock and visible damage is present, pause measurement use until its condition has been assessed.
Clean Benches, Chips, and Stationary Workpieces
A clean bench and a stationary workpiece help reduce contamination that may affect measurement confidence. Chips, dust, grit, coolant, or surface movement can reach measuring contact points and increase scratch risk or reading risk if they remain between the measuring tool and the workpiece.
Clean Benches, Chips, and Stationary Workpieces demonstrates the workspace conditions that should be checked before measurement. The image below shows a clean bench area, a stationary workpiece, cleared debris, protected contact points, and a cloth or brush ready for routine cleaning.
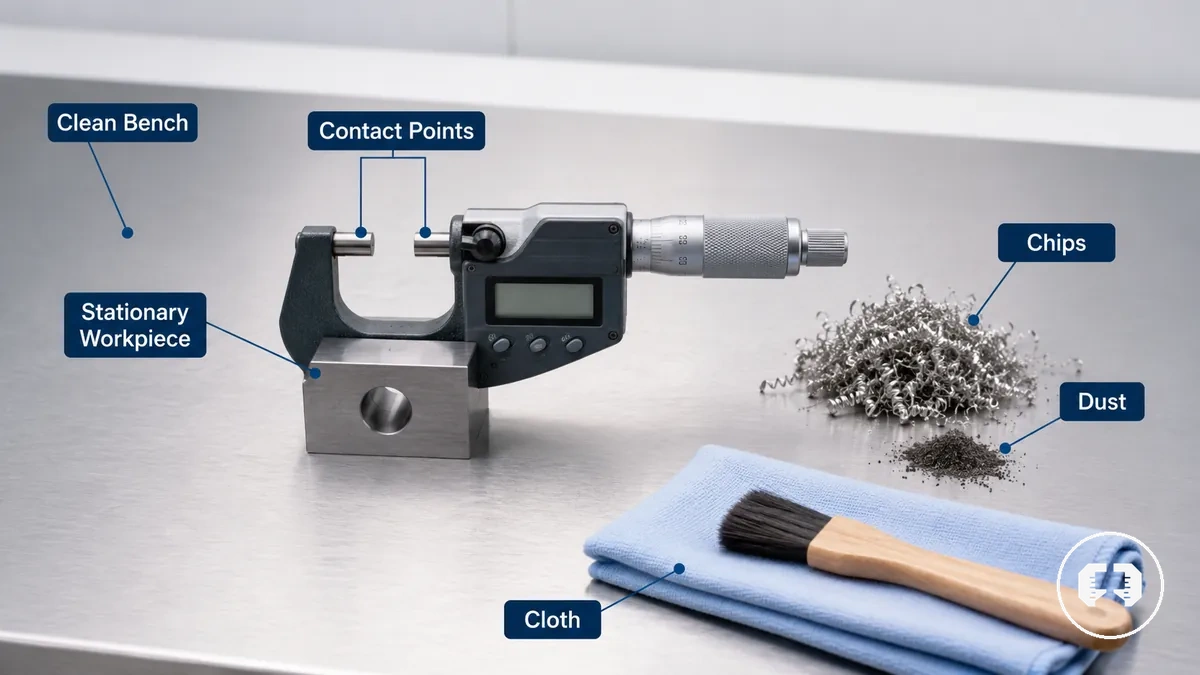
Debris or workpiece movement can often be addressed before measurement by cleaning the bench surface and confirming the workpiece remains stable. For example, a small chip trapped between the contact points and the workpiece may create a false or inconsistent reading until the contamination is removed.
Clean Benches, Chips, and Stationary Workpieces helps verify that the workspace is ready for measurement.
- Keep the clean bench free from chips, dust, grit, and loose debris to reduce scratch risk.
- Confirm the stationary workpiece does not slip or move during measurement to reduce reading risk.
- Remove coolant, oil, or residue from contact points before measuring to reduce contamination.
- Keep the bench surface clear around the measuring tool so surrounding debris is less likely to reach contact points.
- Use a clean cloth or soft brush to remove loose chips or dust before measurement begins.
Cleaning Precision Measuring Tools Without Damaging Measurement Faces
Cleaning precision measuring tools should begin with gentle methods because the wrong cleaning approach can increase the risk of damaging measurement faces or contact surfaces. Light cleaning with a soft cloth or a suitable brush can help remove debris and residue while protecting sensitive surfaces, although the appropriate method depends on the tool type and its condition.
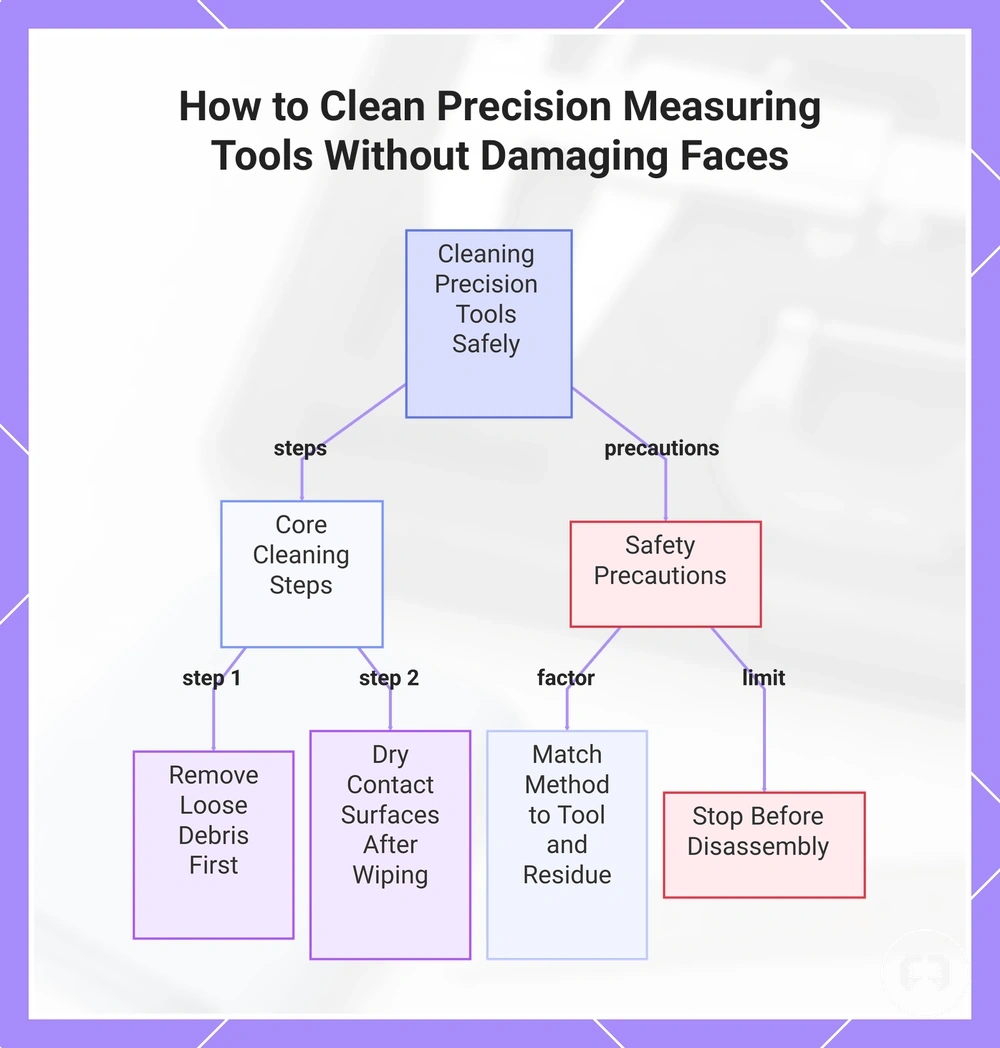
Tool type, residue, and surface sensitivity should guide each cleaning method. Remove loose debris before wiping measurement faces to reduce the chance of dragging particles across sensitive surfaces. After surface cleaning, dry the contact surfaces carefully because moisture, coolant, or remaining residue may affect the condition of the tool if left in place.
Routine cleaning removes normal debris and residue without changing the measuring instrument or its adjustment. If effective cleaning would require disassembly or service-level cleaning, routine maintenance should stop at that boundary rather than continuing into work that may require inspection or servicing.
Cleaning Precision Measuring Tools Without Damaging Measurement Faces organises the routine cleaning steps below according to tool condition, surface sensitivity, and contamination level.
- Use a clean soft cloth to wipe measurement faces and remove light residue.
- Use a soft brush to lift loose debris from contact surfaces before wiping.
- Choose the cleaning method according to the tool type, residue, and sensitive surfaces.
- Dry contact surfaces carefully before returning the measuring tool to storage.
- Use light cleaning methods that protect measurement faces instead of applying unnecessary force.
- Limit routine cleaning to external surfaces, and avoid disassembly when service-level cleaning may be required.
This chart shows the safe cleaning steps and precautions to protect measurement faces during routine maintenance.
Soft Cloths, Brushes, Wiping, and Drying
Soft Cloths, Brushes, Wiping, and Drying work best when performed in sequence to remove light debris and residue while reducing the risk of scratching contact surfaces or leaving moisture behind. The appropriate cleaning method may vary with the tool type, surface condition, and the amount of residue present.
Soft Cloths, Brushes, Wiping, and Drying follows the repeatable routine below, with each step focused on a specific surface and the risk it helps reduce.
- Wipe the contact surfaces with a soft cloth or microfiber cloth to remove light residue while reducing scratch risk.
- Use a fine brush to lift debris from corners and around measuring faces where particles may remain after wiping.
- Dry wipe the contact surfaces to remove remaining moisture and help reduce corrosion risk.
- Check that no residue remains on the contact surfaces before closing the tool to reduce the chance of trapped debris between the measuring faces.
- For example, wiping the contact surfaces before closing the tool can help prevent small debris particles from becoming trapped during light cleaning.
This chart shows the recommended cleaning sequence for contact surfaces, including wiping, brushing, drying, and a final residue check.

Solvent, Water, and Deep-Cleaning Boundaries
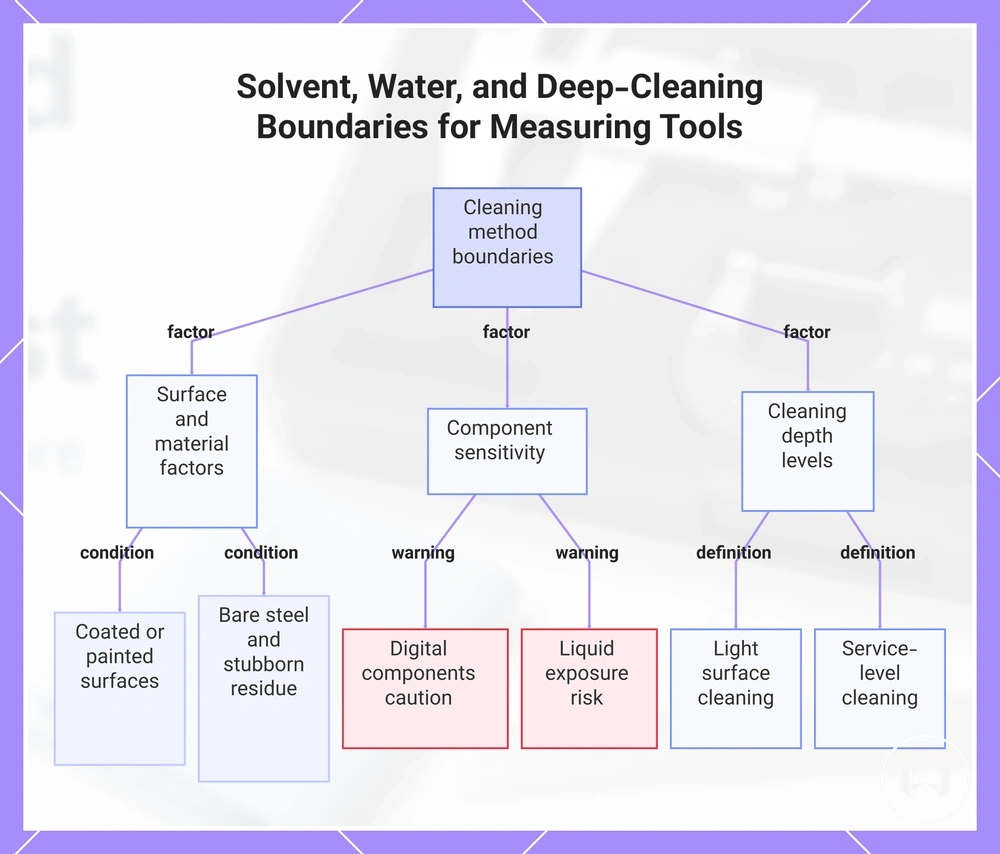
Solvent, water, and deep-cleaning boundaries depend on the tool material, digital components, coatings, and manufacturer guidance rather than a single cleaning method. Avoid aggressive liquid use unless tool-specific guidance supports it, because different materials and components may respond differently to liquid exposure.
Water, cleaning fluid, or another solvent may be suitable only under conditions appropriate for the measuring tool. Digital components, painted surfaces, coatings, bare steel, and stubborn residue each influence the safer cleaning method, while service-level cleaning remains separate from ordinary surface cleaning when routine methods are no longer appropriate.
Solvent, Water, and Deep-Cleaning Boundaries clarifies the criteria below so the cleaning method matches the affected part, its condition, and the associated risk.
- Liquid exposure: Match solvent or water use to the affected surface because excess moisture may increase risk on sensitive parts.
- Digital components: Use extra caution around moisture exposure and follow manufacturer guidance before applying cleaning fluid near electronic areas.
- Coatings and painted surfaces: Choose a method that suits the coating to help reduce the risk of surface damage.
- Bare steel and stubborn residue: Dry bare steel carefully after cleaning to help reduce corrosion risk, and treat stubborn residue according to tool-specific guidance rather than increasing cleaning aggressiveness.
- Light surface cleaning: Removes light residue from accessible surfaces using gentle methods appropriate to the tool.
- Service-level cleaning: May be appropriate when stubborn residue cannot be removed through routine cleaning and manufacturer guidance or tool-specific guidance indicates further servicing.
This chart shows the key factors and categories that define safe cleaning methods for measuring tools, based on material, components, and cleaning depth.
Rust Prevention for Precision Measuring Instruments
Rust prevention for precision measuring instruments starts with controlling moisture on bare metal and steel surfaces because prolonged moisture exposure can increase corrosion risk. Keeping metal measuring tools clean, dry, and lightly protected where appropriate can help reduce surface corrosion, although the most suitable approach depends on the tool, storage exposure, and workshop conditions.
Fingerprints can leave moisture and residue on steel surfaces, contact faces, threads, and scales if they remain after use. Wiping these areas before storage helps reduce corrosion risk, while a light protective oil may be appropriate for exposed bare metal when manufacturer guidance supports its use. Remove excess protective oil before storage because it can attract debris, and do not treat protective oil as a substitute for dry storage or calibration.
In a humid workshop, coastal storage environment, or an area where coolant is used regularly, moisture may remain on precision measuring instruments for longer periods. Under these conditions, drying and rust prevention checks may need to be carried out more frequently, depending on storage exposure, material, and routine use.
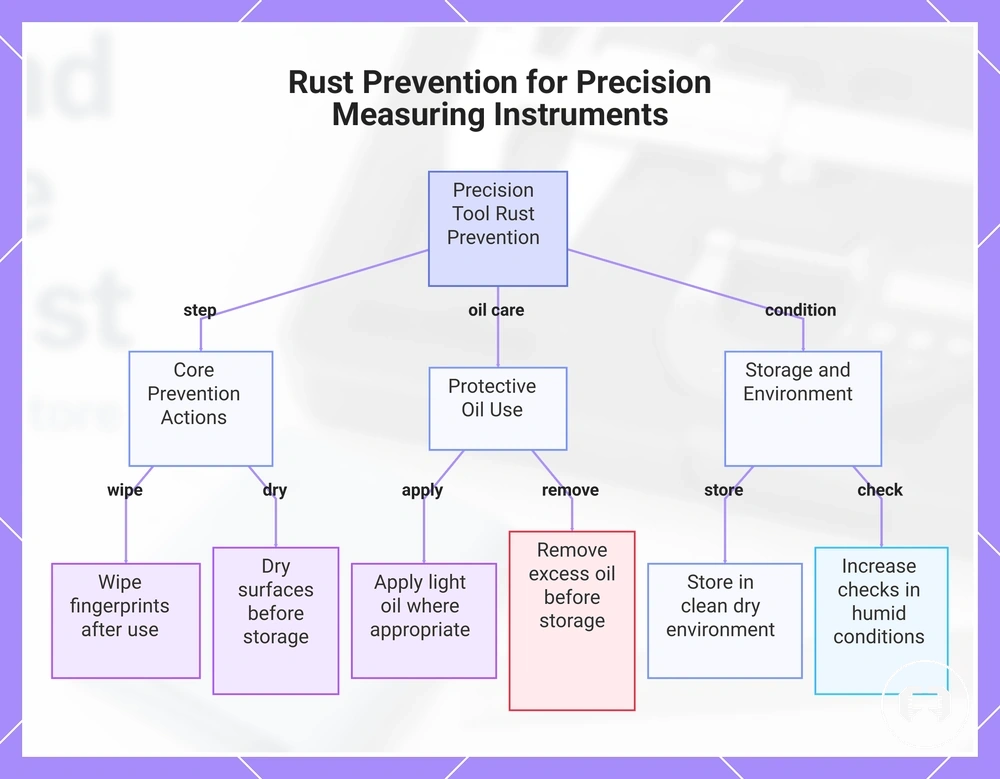
Rust Prevention for Precision Measuring Instruments organises the checklist below to help manage corrosion risk during routine maintenance.
- Dry steel surfaces and contact faces before returning the tool to storage.
- Wipe fingerprints from bare metal, threads, and scales after use.
- Apply a light protective oil only where appropriate, then remove excess oil before storage.
- Store precision measuring instruments in a clean, dry environment to help reduce moisture exposure.
- Increase rust prevention checks when tools are used around coolant or stored in humid conditions.
This chart outlines the essential cleaning, oiling, storage, and monitoring actions to prevent corrosion on precision measuring tools.
Light Protective Oil and Excess-Oil Removal
Light protective oil should be applied as a thin protective film only where it is appropriate, and excess oil should be wiped off after application. Keeping measurement faces free from oil residue helps reduce the chance of debris collecting on contact surfaces or changing contact behavior during measurement.
Light Protective Oil and Excess-Oil Removal follows the steps below so the application surface receives light protection without leaving unnecessary residue.
- Apply a small amount of light protective oil to the intended application surface where corrosion protection is appropriate.
- Limit the protective film to non-measuring areas unless tool-specific guidance indicates otherwise, and avoid leaving oil on measurement faces.
- Wipe off excess oil so only a thin protective film remains on the metal surface.
- Check that measurement faces are clean and free from oil residue before returning the tool to use or storage.
- For example, excess oil can attract debris and change contact behavior if residue remains on measurement faces or other measuring contact areas.
This chart shows the main steps for applying light protective oil and removing excess oil to protect surfaces without leaving residue on measurement faces.

Moisture, Dust, and Corrosion-Risk Conditions
When moisture, dust, and other corrosion-risk conditions increase, maintenance frequency may also need to increase because environmental exposure can leave contamination or moisture on precision measuring tools. Humidity, coolant, fingerprints, temperature swings, and longer storage duration can each influence whether routine wiping is enough or whether extra drying and protection may be appropriate.
Moisture, Dust, and Corrosion-Risk Conditions organizes the table below by care response so maintenance decisions match workshop exposure and tool condition. Routine wiping may be sufficient after light exposure, while repeated or heavier exposure can justify extra drying and protection depending on the measuring instrument, storage duration, and surrounding conditions.
| Condition | What it affects | Maintenance response | Risk if ignored |
|---|---|---|---|
| High humidity or dampness | Metal surfaces and retained moisture | Dry the tool carefully and use extra protection where appropriate | Corrosion risk may increase over time |
| Dust or airborne dust | Surface contamination and contact areas | Routine wiping to remove dust before storage or use | Debris may increase surface contamination or wear |
| Coolant or fingerprints | Metal surfaces and measurement faces | Wipe away residue and complete thorough drying | Moisture and residue may increase corrosion risk |
| Temperature swings or extended storage duration | Stored tool condition | Increase maintenance frequency and inspect whether extra drying or protection is needed | Surface deterioration may become harder to detect |
Storage Conditions That Preserve Accuracy
Storage conditions help preserve the physical condition of precision measuring tools and support measurement reliability, but they do not guarantee accuracy. Keeping tools clean, dry, protected, and separated can reduce exposure to contamination, corrosion, impact, and other conditions that may affect measurement confidence over time.
A protective case, tool case, drawer organizer, or similar storage arrangement helps reduce tool contact, pressure, and abrasion during storage. Humidity, temperature changes, dust, and prolonged storage duration may increase corrosion or drift risk depending on the tool, material, and workshop exposure. Keeping measuring tools separated and protected helps reduce unnecessary contact with other objects that could damage sensitive measuring surfaces.
Storage Conditions That Preserve Accuracy organizes the storage factors below by risk so routine storage decisions remain focused on condition control. Proper storage supports physical condition and measurement reliability, but it does not replace calibration or correct measuring technique when accuracy needs to be verified.
| Storage factor | Condition to check | Risk controlled | Practical response |
|---|---|---|---|
| Protective case or tool case | Tool is protected during storage | Impact and abrasion | Store the tool in a protective case when practical |
| Organizer or drawer organizer | Tool separation is maintained | Tool contact and surface damage | Keep precision measuring tools separated from other metal items |
| Humidity, temperature, and dust | Storage area remains clean and dry | Corrosion and surface contamination | Inspect, wipe, and dry the tool when environmental exposure increases |
| Storage duration and pressure | Tool is not under unnecessary load during extended storage | Physical damage and drift risk | Avoid stacking tools and inspect them before returning them to service after long storage |
Protective Cases, Organizers, and Tool Separation
Loose storage can increase the risk of contact-surface damage when precision measuring tools come into contact with other tools or hard objects. Protective Cases, Organizers, and Tool Separation organize storage around cushioning and separation to help reduce impact and abrasion on sensitive measuring parts.
- A caliper case helps protect the jaws by cushioning the tool during storage and reducing impact from surrounding objects.
- A micrometer case with a foam insert helps support the anvils, limits unnecessary movement, and reduces abrasion during storage or transport.
- A drawer organizer keeps precision measuring tools separated so contact between tools is less likely to damage measuring surfaces.
- Providing desiccant space inside a storage case may help reduce moisture exposure when additional drying protection is appropriate.
- For example, storing a caliper and a micrometer loose in the same drawer can allow the jaws, anvils, or indicator housing to strike each other, increasing the risk of impact or abrasion.
Heat, Sunlight, Humidity, and Workshop Exposure
Heat, sunlight, humidity, and workshop exposure can affect stored precision measuring tools differently depending on the storage environment, tool material, and duration of exposure. Direct sunlight, moisture, dust, or chemical exposure may increase corrosion risk, influence lubricant behavior, or affect sensitive components, so storage conditions should be matched to the measuring tool and its environment.
Temporary temperature effects differ from physical damage or calibration drift. For example, cold-to-warm condensation may leave moisture on metal surfaces and should be addressed through drying, while lasting changes depend on factors such as storage conditions, material, and continued environmental exposure rather than temperature change alone.
Heat, Sunlight, Humidity, and Workshop Exposure checks the storage conditions below to identify common environmental risks.
- Direct sunlight and heat sources: Reduce prolonged exposure because heat may contribute to temperature effects or influence lubricant behavior over time.
- Humidity and condensation: Moisture from humid conditions or cold-to-warm condensation can increase corrosion risk if tools are stored before they are dry.
- Damp drawers: Avoid storing precision measuring tools in damp drawers where moisture may remain around metal surfaces.
- Dust: Keep the storage environment clean because dust can settle on contact surfaces and other precision components during storage.
- Chemical exposure: Limit exposure to chemical vapors or residues that may affect metal surfaces, coatings, or other tool materials, depending on the measuring instrument.
Care Checklist by Measuring Tool Type
A care checklist helps match routine maintenance to each measuring tool type because contact surfaces, movement points, and storage risks differ between instruments. Tool-specific care focuses on preserving condition and reducing contamination, impact, or corrosion rather than proving measurement accuracy.
Calipers, micrometers, gauges, indicators, and squares each have different parts that benefit from routine attention. Contact surfaces should remain clean and protected. Movement points should stay free from unnecessary contamination where routine care allows.
Care Checklist by Measuring Tool Type organizes the criteria below by tool part, care action, and storage risk. Match the protective case or organizer to the instrument shape and sensitive components so routine storage better supports long-term condition.
| Tool type | Part to protect | Care action | Storage risk controlled |
|---|---|---|---|
| Calipers | Jaws and slider | Keep contact surfaces clean and store in a protective case | Impact, abrasion, and contamination |
| Micrometers | Spindle and anvil | Clean measuring faces and use a case that supports the tool securely | Surface damage and unnecessary movement |
| Gauges | Measuring faces or contact points | Keep dry, clean, and protected from debris | Dust, corrosion, and contamination |
| Indicators | Stem and moving components | Protect from dust and avoid unnecessary impact during storage | Dust intrusion and physical damage |
| Squares | Reference edge | Store where the edge is protected from contact with other tools | Edge damage and abrasion |
Choose a protective case or organizer according to the measuring tool shape and the sensitivity of its contact surfaces or movement points rather than treating all storage solutions as interchangeable. Routine care and suitable storage help reduce handling and storage risks, although maintenance needs may vary by measuring instrument type and condition.
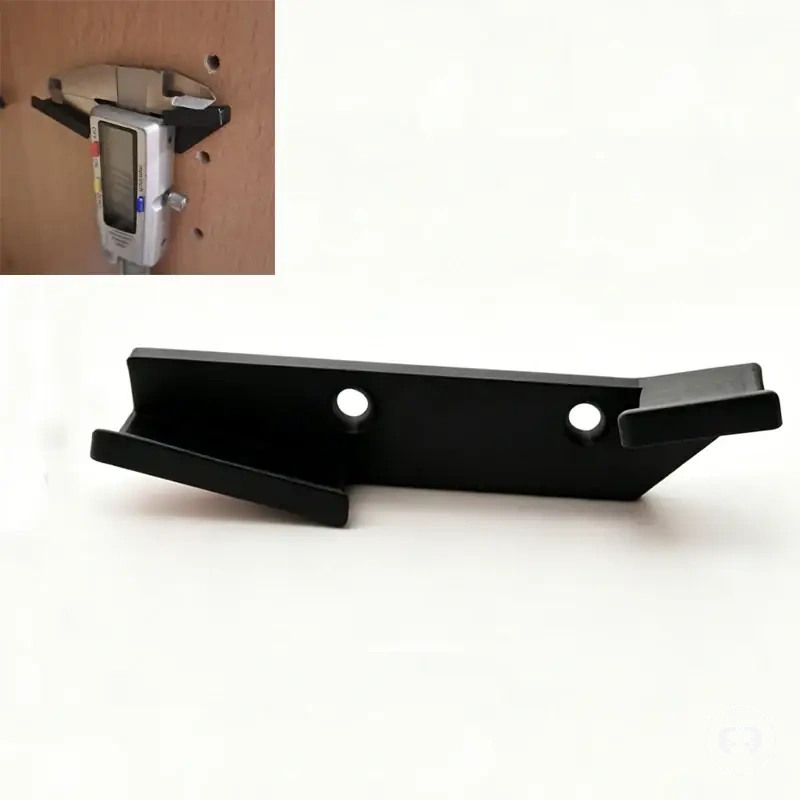
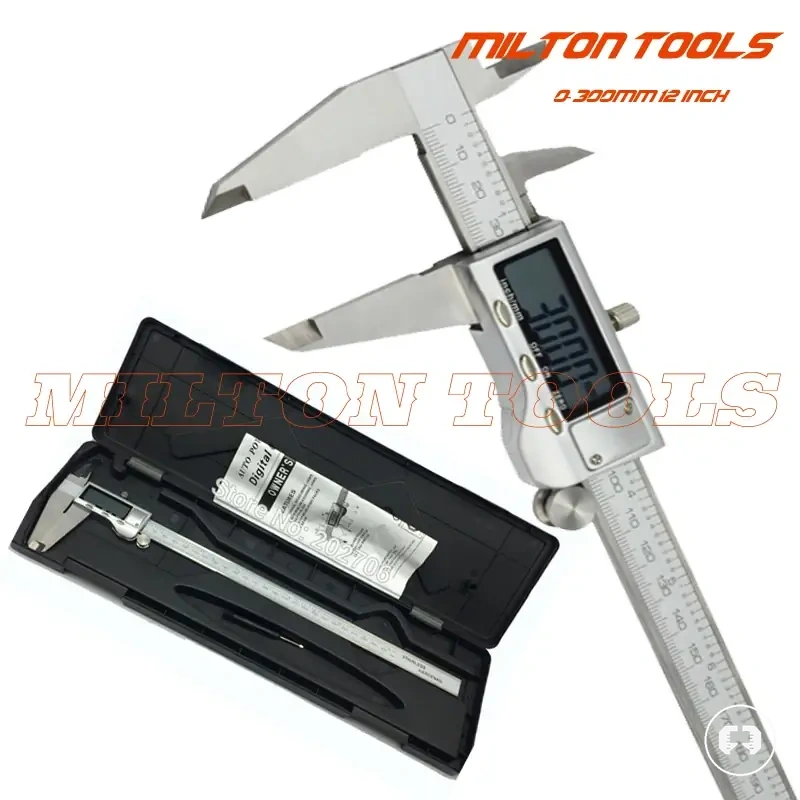
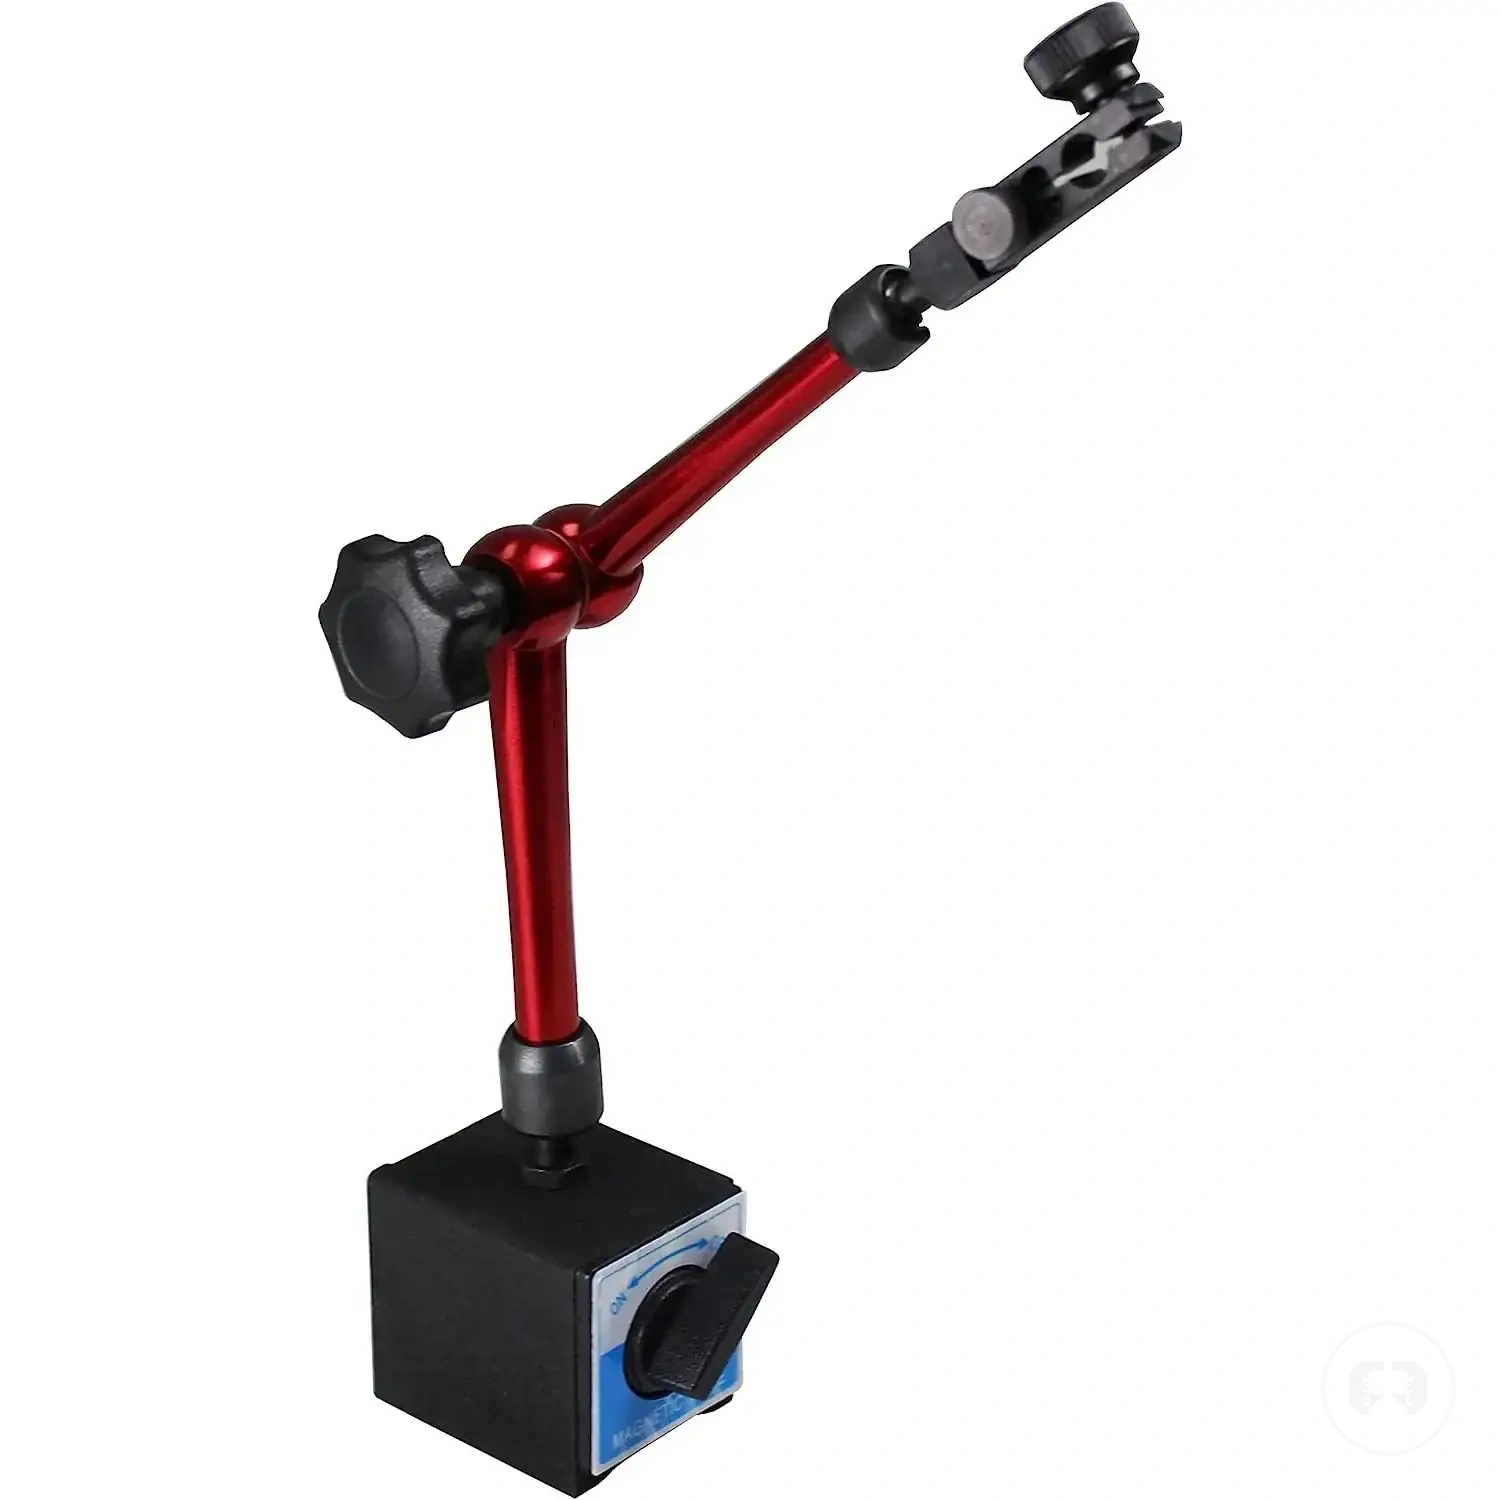
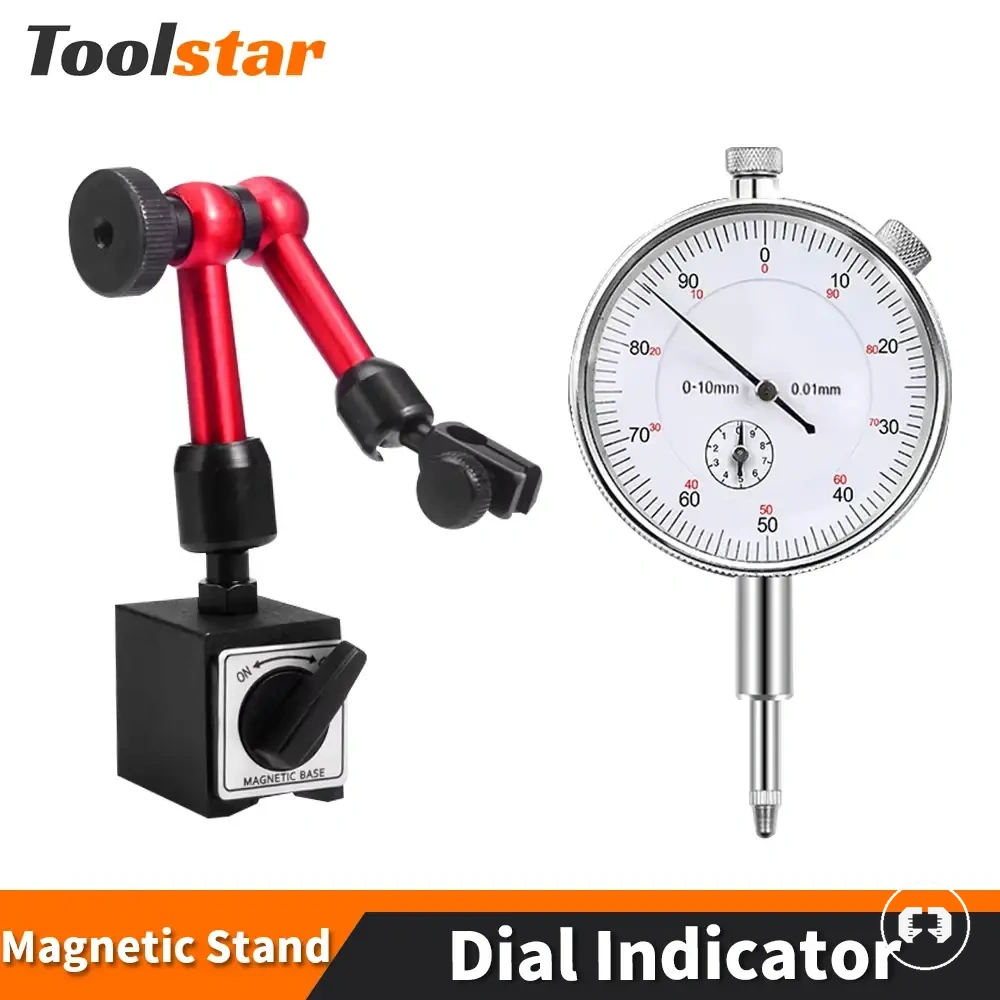
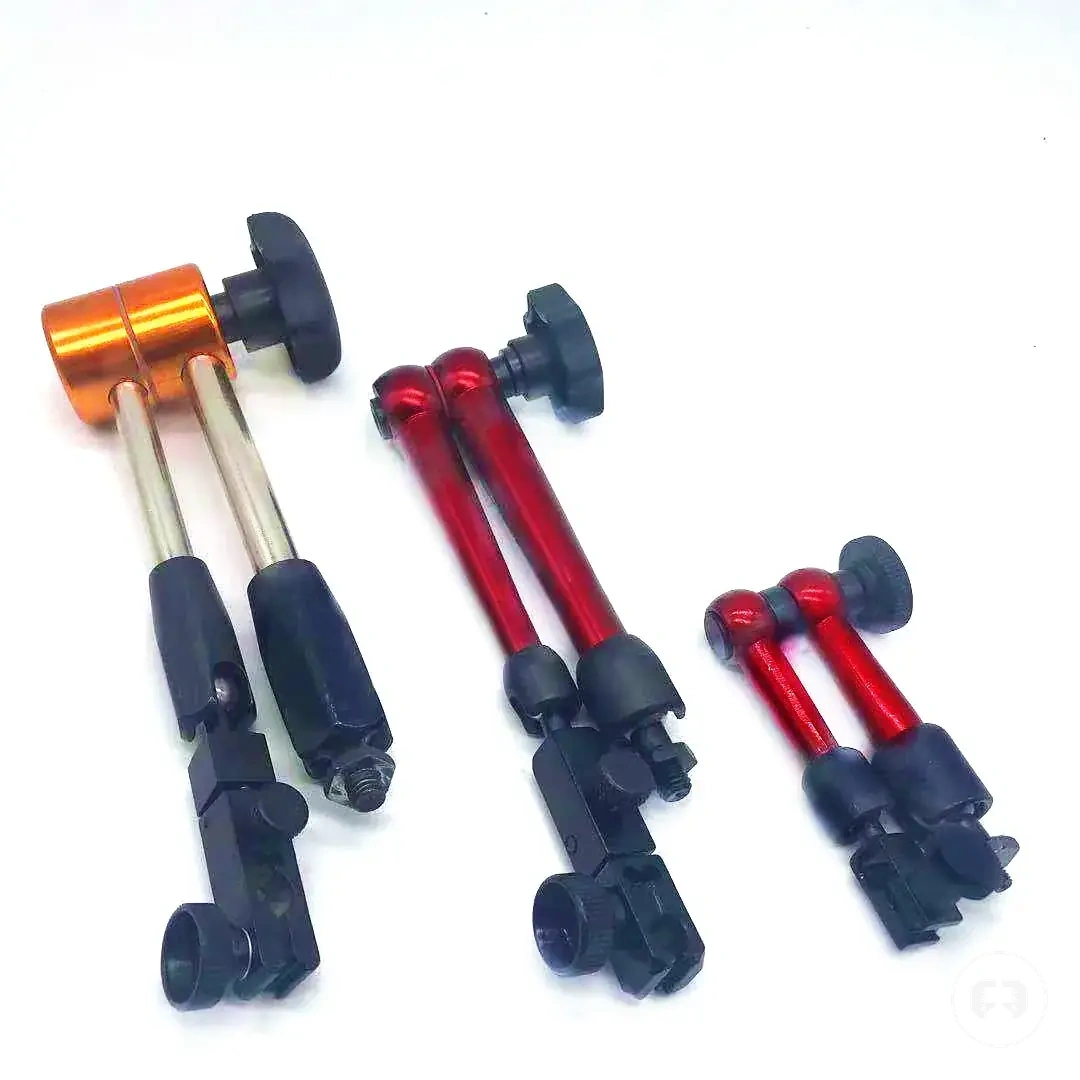
Here are product examples that may make comparison easier. Before buying, always review the compatibility criteria, essential features, and product details.
Caliper Care and Storage Checklist
Caliper Care and Storage Checklist verifies the caliper parts most affected by debris, movement, and storage exposure. Caliper care should focus on clean jaws, smooth slider movement, and protected storage so contact surfaces remain less exposed to reading-reliability risks.
- Check the jaws for debris before and after use, because particles on the contact surfaces can cause inconsistent contact and reading variation.
- Wipe the beam and scale with a clean cloth so dust or residue is less likely to interfere with visibility or slider movement.
- Move the slider gently after cleaning to confirm it travels smoothly without dragging debris along the beam.
- Inspect the depth rod before storage so it is clean, retracted where appropriate, and less exposed to bending or impact in the storage case.
- Keep the display area dry and free from residue, using extra caution around moisture and the battery area on digital calipers.
- Return the caliper to its storage case after use to reduce impact, dust exposure, and contact with other tools.
- For example, a small chip left on the jaws may prevent full contact with the workpiece and create inconsistent readings until the debris is removed.
Micrometer Care and Cleaning Checklist
Micrometer Care and Cleaning Checklist verifies the parts that help maintain clean contact and smooth movement during routine care. Micrometer care should focus on protecting the spindle, anvil, ratchet, and thimble while removing debris and moisture before storage.
- Clean the spindle and anvil contact faces before and after use to help reduce debris that may affect clean contact and measurement confidence.
- Operate the ratchet and thimble gently to confirm smooth movement without forcing the mechanism.
- Keep the sleeve clean so scale markings remain visible and residue is less likely to collect around moving parts.
- Check the thread feel during routine use. If movement becomes sticky or readings appear suspect after cleaning, a calibration check may be appropriate rather than further routine cleaning.
- Apply light oil only where appropriate, then remove excess oil so debris is less likely to collect on moving components.
- Complete moisture removal before placing the micrometer in a protective case with suitable case fit to help reduce corrosion risk and protect sensitive contact faces during storage.
Gauge, Indicator, and Square Care Checklist
When gauges, indicators, and squares are exposed to dust, impact, or poor storage, measurement confidence may be reduced even when no visible damage is present. Gauge, Indicator, and Square Care Checklist verifies shared protection needs by focusing on clean contact surfaces, protected moving parts, and suitable storage orientation.
- Gauges: Keep gauge dial faces and protective lenses clean, and protect bases from impact to help reduce dust buildup and viewing or handling issues.
- Indicators: Keep plungers and stems clean so dust is less likely to interfere with smooth movement or increase reading risk.
- Indicators: Store indicators in a stable storage orientation that helps protect the stem, dial face, and base from unnecessary impact.
- Squares: Protect reference edges from knocks, abrasion, and contact with other tools because edge damage may reduce measurement confidence.
- Shared care: Keep gauges, indicators, and squares clean, dry, and separated during storage to help reduce contamination and accidental damage.
- Example: Dust on an indicator stem can restrict smooth movement and may reduce measurement confidence until the contamination is removed.
Maintenance Mistakes That Can Affect Measurements
Maintenance mistakes can create false confidence because a precision measuring tool may appear usable while contamination, poor handling, or storage conditions increase measurement risk. Routine care can help reduce avoidable measurement risk, but it does not replace correct use, calibration checks when appropriate, or condition assessment if readings become inconsistent.
Maintenance Mistakes That Can Affect Measurements organizes the checklist below by mistake, likely effect, and a safer habit. The outcomes are condition-dependent, so the same care error may not affect every tool or measuring situation in the same way. The checklist highlights avoidable mistakes without repeating full cleaning or storage procedures.
| Mistake | What it affects | Likely risk | Safer habit |
|---|---|---|---|
| Dirty faces | Contact surfaces | False confidence and increased reading risk | Keep contact faces clean before measurement |
| Rough handling | Tool condition and movement | Impact may increase measurement risk | Handle measuring tools carefully |
| Wet storage | Metal surfaces | Corrosion may develop over time | Store tools dry after use |
| Excess oil | Contact areas | Debris may collect on measuring surfaces | Leave only a light protective film where appropriate |
| Loose storage | Sensitive components | Impact and abrasion | Keep tools protected and separated |
| Ignored damage | Contact or movement | Measurement confidence may decrease | Inspect visible damage before continued use |
| Measuring on a dirty workpiece or moving workpiece | Workpiece contact | Higher reading risk | Measure on a clean, stable workpiece where practical |
For broader guidance on handling and use beyond routine maintenance, see preventing measurement errors. A cosmetic mark on a non-contact surface may have little effect on measurement confidence, while damage that affects contact surfaces or smooth movement can increase reading risk.
When Care Problems Need Calibration or Replacement Checks
Visible damage, inconsistent readings, sticky movement, corrosion on contact surfaces, or repeated zeroing issues may indicate that routine care is no longer enough and a calibration check or replacement check should be considered. Routine maintenance can help preserve tool condition, but it cannot confirm measurement confidence when these symptoms remain after normal care. The appropriate next check depends on the tool condition, the symptom, and the measuring application.
When Care Problems Need Calibration or Replacement Checks separates routine maintenance from calibration and replacement signals. Care problems that continue after normal cleaning, drying, or storage may indicate a condition that requires further evaluation rather than repeated maintenance. Avoid assuming that cleaning restores accuracy because suspect readings, persistent sticky movement, or visible damage can remain after routine care. The decision checklist below organizes each symptom, its likely condition, the next check, and its possible effect on measurement confidence.
| Symptom | Likely condition | Next check | What it means |
|---|---|---|---|
| Visible damage | Contact surfaces or moving parts may be affected | Inspect tool condition and consider a calibration check or replacement check | Measurement confidence may decrease |
| Inconsistent readings | Tool condition requires further evaluation | Perform a calibration check after routine care | Reading repeatability may be affected |
| Sticky movement | Movement remains abnormal after routine care | Evaluate tool condition before continued use | Smooth operation may no longer be reliable |
| Corrosion on contact surfaces | Critical measuring surfaces may be affected | Assess whether a calibration check or replacement check is appropriate | Measurement confidence may be reduced |
| Repeated zeroing issues | Persistent condition beyond routine maintenance | Consider a recalibration check | Zero reference may no longer remain consistent |
Routine care defines the maintenance boundary, while persistent symptoms should lead to condition-based evaluation instead of repeated cleaning attempts. For broader guidance on deciding between these adjacent maintenance outcomes, see recalibration and replacement signs. Recalibration and replacement remain adjacent support topics rather than part of routine maintenance.